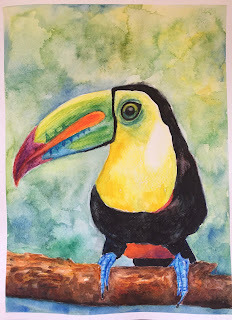
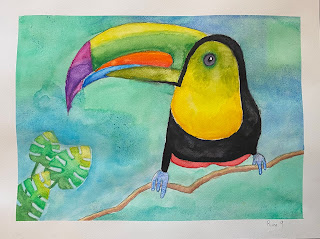
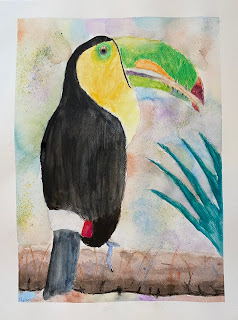
This project is a great way to explore the versatility and magic of watercolor pencils, and the theme is one that any kid can get behind. The toucan? What a strange and colorful bird! And the gradations and subtle color shifts in the bird's enormous beak is a wonderful way to explore creating color transitions, blending, layering, and creating both soft and hard edges with watercolor pencils.
Step 1. Drawing
Students each chose a teacher-provided photo of a toucan to take inspiration from. They drew this out lightly using pencil on watercolor paper. A teacher demo on the whiteboard helped them visualize how I would draw a toucan. Starting with the basic overall form just to get the size and placement down, then refining these lines and shapes, then addressing the enormous beak with it's curved upper beak, pointy tip, and straighter lower beak. It's important to get this beak step right, otherwise our toucan will not look like a toucan. We spent a good amount of time just on the beak, really analyzing its curves, features, and size relationship to the rest of the head and body. Then on to the rest of the features, including round marble-like eye, claw-like wrinkly toes, and the branch.
Step 2. Coloring, Dry on Dry
Students colored their toucan looking closely at the reference photo in order to match color, color transitions, value gradations, and color layering. We used dry watercolor pencils. No water yet! They simply approached this step as through they were using basic colored pencil techniques: layering, blending, using various degrees of pressure to achieve different color intensity and values. For the black body, students started coloring the body with a light layer of either red or blue, then colored over top with heavy black. The blue/red underneath creates a more interesting, dynamic black that appears less flat.... and in fact, we did see hints of blue or red under the black in our reference photos.
Step 3. Activating the Dry with Water
Once all our toucan was colored in dry pencil, we carefully activated the color with a wet brush.Important tips for best results:
1. Start activating your lightest color first (for example, yellow, then orange, then red)
2. Rinse out your brush with clean water each time you switch to a new color, unless you want your colors to mix. If you activate green, and then move on to activate red without rinsing out your brush, you will end up mixing green and red together (= brown!)
3. Just like with watercolor, make sure different colored edges don't touch when wet, or they will bleed together.
Step 4. Creating a Palette of Colors for the Branch
Student created their own 'palettes' using many neutral colors in order to create their branch.
How? Take a strip of watercolor paper and color many squares of color using branch colors (grey, browns, ochres, yellows, some blues, black...). This is now your palette. Take a wet brush and active the square you wish to paint from, then apply your brush (which has now picked up color from your palette) to your paper and paint with the color collected on your brush. Do this repeatedly with all colors, creating branch and bark texture as you go. For ex: students use their brush in short horizontal strokes to mimic the growth of bark.
Step 5. Adding Leaves
Student had the option to add leaves in their composition. Important was that the leaves were large, since jungle leaves are large, and that they come in from one or more sides of their picture frame in order to create a fuller composition. These were colored dry, then activated with wet, just like the toucan.
Step 6. Background
Students created another ‘palette’ for their background using sky and jungle colors: blues, greens, yellows, purple. Using a wet-on-wet technique (wet the paper with clean water, then add wet color into it) students dropped these colors into their wet background for a soft, blurry effect.
Step 7: Sandpaper
While the background was still wet, students took a strip of sandpaper and sanded a pencil on it, dropping these colored pencil particles into their wet background. This creates interesting texture and color spots for an added touch of interest.


