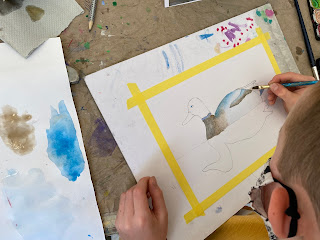
I thought it would be a fun challenge to introduce my 8-10 year old group to painting water in watercolor, with help of the magic of masking fluid. They'd never used this little trick before, so we had a good time exploring it, not only in our water, but in a few choice spots in our mallard ducks too.
Why the mallard duck for this project?
I love the the bold pops of green and blue color of this bird's head and chest, paired with the range of neutrals in his body. I knew this would be a good way for my kids to explore mixing and painting with various values of neutral tones, while also allowing them to play with the brighter colors in their palette.
Step 1: Drawing
Students chose a reference photo of a duck. Using light pencil, students each began drawing their duck by observation. A teacher drawing demo on the whiteboard helped them visualize how I drew out my own duck. We began with the general, large shape of the body (kind of like a football or almond), then the round head, connected to body by a sloped neck. We then refined these shapes and curves to create a realistic rendition of our duck. Placement, size and length of beak was analyzed, then the eye. Next we lightly sketched in other details, like wing, tail tuft, foot (if visible) and then the duck's reflection in the water.
Step 2: Masking Fluid
Students looked closely at their reference photo and used masking fluid anywhere on their drawing where there were bright whites. They added some swirls and curved lines in the water, and anywhere on the bird where they wanted to preserve these bright whites, for example in the tail area, a few spots on their body, the ring at the base of the neck, the white reflection spot in the eye and on the beak. We used a small detail brush or a toothpick to apply the masking fluid. These there then dried with the blow drier.
Step 3: Painting and Neutral Color Mixing
Students began painting the body of their ducks using neutral colors. They were instructed to use all the browns and blues on their palette, with a touch of black to darken the value.
Important tip: blues mixed with browns creates the most beautiful neutral, gray tones. Try ultramarine blue with burnt sienna for a deep, natural grey - MUCH better than just using black to create grey.
Students knew to use more water with less pigment for softer, lighter, more transparent color applications, and inversely, less water and more pigment for stronger, deeper and darker values. We slowly built up the values in our ducks this way, starting light and gradually adding darker tones and values.
Moving on to the head, we mixed greens and blues, and started with a light application of this color, then gradually added darker values to create dimension. Beaks were done in yellow with a touch of orange. Eyes were done using a tiny detail brush and black paint. The bird's reflection in the water was painted the same way, but with a softer, looser, more blurry touch.
Students often had to be encouraged to go darker with their values. Deepening their browns with a dark blue and a touch of black was the ticket, and using more pigment and less water. As soon as they did this, they could see the strong contrast and dimension of their bird really come to life.
Step 4: Water
Students mixed a very light value of a blue-grey color (blue with some brown) and applied this across their whole background using the wet-on-wet technique. They gradually added darker areas of color in their water by mixing different blues, greens and browns, always referencing their photo for guidance. They were encouraged to apply paint in such a way that it mimics the movement of the water, so using curved lines and dashes to mimic the little swells in water.
Step 5: Erasing the Masking Fluid
Paintings were thoroughly dried with the blow drier, and then the masking fluid was rubbed off. This was done either by using our index finger, or with a rubber cement eraser. This revealed beautifully crisp areas of white.
The success of this project surprised me - it was by no means an easy theme or an easy medium - but with some previous exposure to watercolor, and with strong step-by-step demos and guidance, the kids managed exceptionally well, and all went home proud as ever!
 |
| Class collage. Ages 9-10 |


