
 |
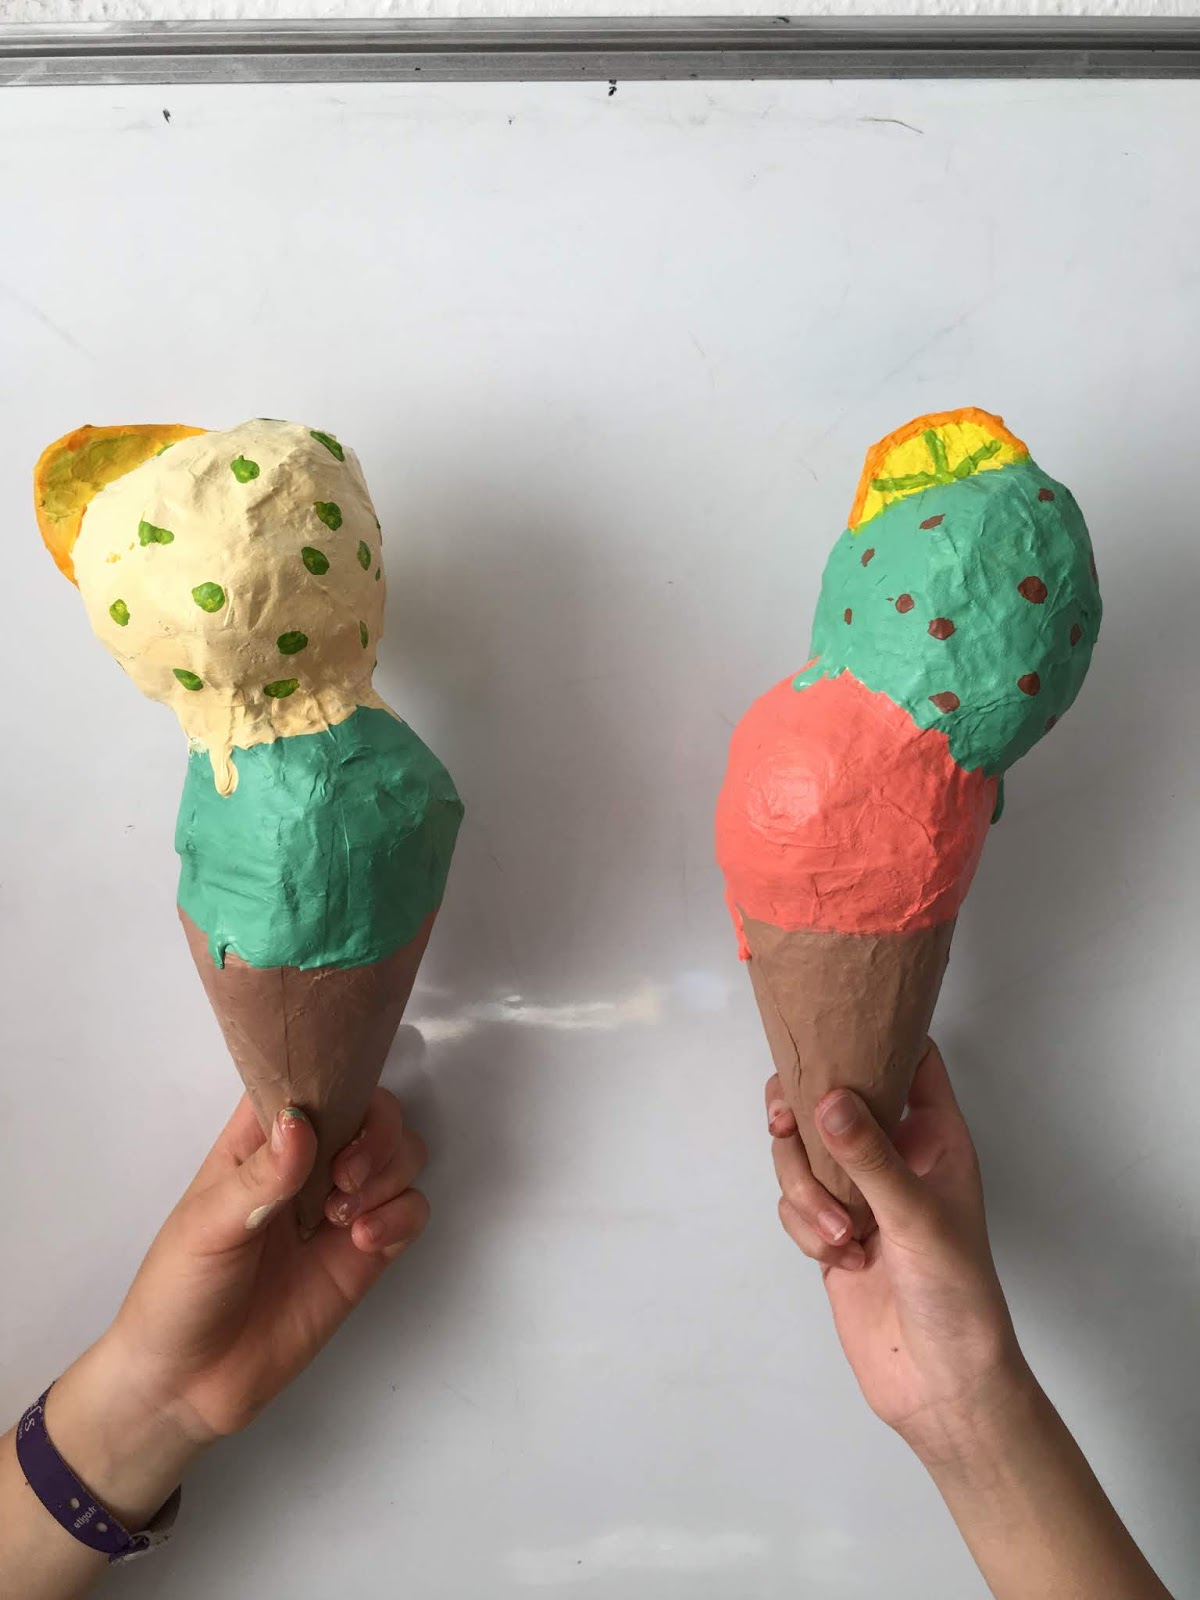
| Enjoying our ice creams! |
Following our previous Shorty Pencil sculptures using plaster, I wanted to introduce my students to another sculpture medium. Our ice-cream cones were made with the most basic materials possible: paper mache and newspaper. And they were SO MUCH FUN!
 |
| 8-14 year olds |
 |
| 8-11 year olds |
 |
| 6-8 year olds |
Cone:
We began with the cones. I pre-traced large circle templates on cardstock and cut these in half. I used a large mixing bowl, turned upside-down, and traced it, approximately 14 inches in diameter. Each student got one half-circle.
To turn the half-circle into a cone, we held it like a smiley (flat edge up and curved edge down) and holding the corners, we carefully began circling one edge around the other edge, creating the pointy tip of our cone at the center of our top flat edge. We used the same cone-making technique that we used for our pencil sculpture. See the cone-making portion of Cassie Stephen's pencil video here. Once we had the cone shape we wanted we taped the edges with a few pieces of artist tape. After taping the cone, we stuffed it with newspaper to make it more durable and prevent it from collapsing.
Scoops:
 |
| Taping our 'scoops' onto our 'cone' |
Topping:
We chose cherries and lemon/orange slices for our topping. Cherries were just a tightly rolled small newspaper ball and slices were half-circles cut out of cardstock and taped securely to our scoops.
Next, we taped one scoop to our cone, securing it with a few strips of painters tape. Then we taped the next scoop to the first scoop, securing with a few strips of tape. We liked the quirky look of the top scoop being slightly off center, so some of us purposefully made our top scoops lean off to one side slightly. Lastly, we put one strip of tape around the point where our scoops meet. This strengthened the overall 'armature' and helps to visually separate one scoop from the next.
 |
| Messy paper mache |
 |
| Drying on the rack until next class |
 |
| Paper mache |
Into large mixing bowls, we mixed 1/2 cup of flour with 1/2 cup of water and whisked them tougher.
I had pre-cut rectangle strips of newsprint and brown packaging paper. (You could use newspaper, but I like the these papers because they are text-free, so are a more neutral base for painting over later. We began with our cone. We dipped out fingers in the paper mache and smeared it on our paper square. We placed this square on our cone and added more paper mache on top to seal it down smoothly onto our armature. We repeated this all over the cone, making sure not to leave any part of the armature uncovered. We also strove for a smooth, wrinkle-free finish. Then onto the scoops using the same technique, smoothing each square of paper as we go, and lathering over top of each piece of paper to seal and glue thoroughly.
That was that for day one.
 |
| Making strawberry and mango flavors |
Day 2
Colors:
To save time and to cut down on paint waste, I pre-mixed a few flavors of ice-cream and the cone color. I knew the kids wanted strawberry, mint-chip, mango and chocolate, so I prepped these. We then made, lemon, raspberry, vanilla by just adding a bit more white to our mango, or a bit more red to our strawberry color.
Painting:
We began by painting the cone first. We dried with the blow dryer and then added some 'cone' texture in a darker brown. We used a plastic sheet with a gridded texture on it (saved from a food packaging) but you could use anything that has some kind of patterned texture. We just lightly dabbed this painted textured piece on our cone, all around, for a subtle texture.
Scoops were painted starting with the bottom scoop first. To achieve the dripping, melting look we took a blob of paint on our brush and placed it on the bottom edge of our scoop and coaxed it downward using gravity by gently tapping our cone on the table, allowing the blog of paint to drip every so slightly. Worked like a charm. Don't tap too hard or you'll damage your cone tip. Paint was applied thickly at the bottom of the scoops to get that creamy look.
The blow dryer was experiencing heavy use during this project. We needed to make sure each section of our ice-cream was dryish before painting the next section, to minimize smearing and colors mixing. Of course, some smudging was unavoidable. We took care to paint over any smudges, or wipe away unwanted smears. We strove for ice-creams that are clean and neat!
Regularly wiping our hands with baby wipes was one way we kept unwanted paint smudges and finger prints from messing up our cones.
Slices were painted in yellow or orange, and then with a fine brush we painted the rind and segments in a darker color. Some students used a Posca pen to draw the segments. Cherries were painted in red with a white light reflection spot.
This project was super fun and the kids just loved it! They all went home with beautiful, creamy, delicious ice-creams that demonstrated care, control and craftsmanship, with a little humor and quirkiness too.
Just perfect for an end-of year project!


 |
| Teacher sample close-up of dripping paint |