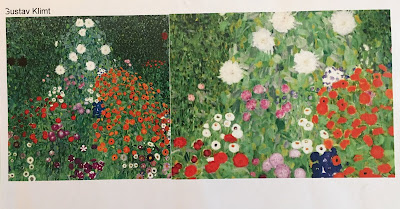
This idea was inspired by Gustav Klimt's floral field. I adore the texture, the variety of greens and the variety of field flowers in this piece. I knew this would be a good opportunity to teach color mixing, brush work and exercising VARIETY in our art.
 |
| Gustav Klimt |
Step 1: I printed out a variety of chick visuals, both photographs and simple drawings. Students chose a few visuals and practiced drawing these on practice paper. I demo'd out loud while drawing a few, describing the curves, the proportions, and the details as I went along, so they could visualize the features. For example, a chick is basically two balls (body and smaller head) with the head connecting to the body in a seamless way without a visible neck; the belly and back are rounded and full; the beak is very small and curves at top and bottom; the feet are thin and the toes with nails are long... etc. Students had a few attempts to draw chicks in different positions.
Step 2: When we felt good about our chick drawings, we moved on to our good paper. I used a grayish paper, which gives the overall painting a slight tonal underglow - but white paper would work just fine too. We taped down our borders with washi tape. Students drew 2-3 chicks on our good paper at the bottom, leaving about 2 finger widths of space at the bottom. For a more interesting overall composition, chicks had to be in different positions, and optimally even facing in different directions.


 |
| Observational drawing |
 |
| How many greens can we mix?! |
Step 3:
Brush techniques: We painted our background using a flat brush in a 'tiling' technique. This means we painted splotches or 'tiles' of color in a loose, quick way, all over our composition until it was full of dense and slightly overlapped splotches with no space between them.
Color mixing: Students were given palettes of 2 greens (hunter and leaf greens), 2 blues (cobalt and ultramarine), ochre, and white. The objective was to mix as many combinations of these colors together as possible, for lots of greens. We explored mixing blues with green, blues with ochre, and greens with ochre. We also discussed the difference between 'blue-green' and 'green-blue', noting that the dominant color in these mixes is indicated by the second color name.
A quick bit of color mixing theory:
Mixing blues and greens with the color ochre tones down the overall look for a more earthy feel. You could use yellow instead of ochre, but you wouldn't get these same toned down hues. Ochre is a dull yellow, which has a bit of red and orange in it. Red and orange are the compliments of green and blue. We know that mixing compliments makes brown.... so when strong blues and greens are mixed with a bit of ochre, you get a slightly toned down, more earthy result.
Students painted with one color at a time, using this one color a few times throughout their composition before making a new color. They did this until they filled up their paper with dense, overlapping 'tiles' of many different blues and green mixes.
Tinting: We regularly added white to our colors to create an overall tinted, softer feel. With gouache, while your paint is still wet, you can simply paint white right over top your blue-green colors, and this will mix with the wet color underneath, creating a tint. It's a quick and effective way to tint your composition and requires no additional palette mixing.
 |
| Background first, then chicks |
 |
| Using the 'tiling' method of paint the background |
 |
| Our palettes of blues, greens, ochre and white |
 |
| Painting the chicks in yellow, white and orange |
Chicks:
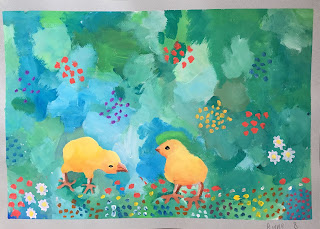
We painted our chicks with yellow and white for a soft, tinted feel. We added a touch of orange or ochre directly onto our painted chicks and blended this into our yellow wherever there is a shadow (under the belly, under the head, under the wing).
Legs and beaks were done with a fine detail brush in browns and oranges, also with attention to shadow and highlights. Eyes are just a little black dot, done with a detail brush.
Flowers:
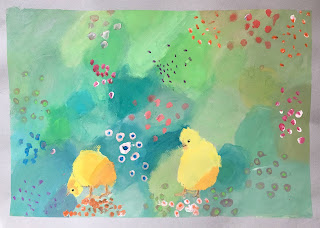
We looked at Klimt's flower painting and noted the variety of sizes and colors. We also noted that his flowers are grouped in patches of like-flowers. Looking out the window, we observed that in our backyard, flowers also grow in patches of like-flowers. We also observed that Klimt's flowers were painted like dots, some bigger and some smaller. This is because the flowers are small and far away from the viewer, so we don't see their details - just a basic dot form. Using a small round brush, we painted patches of 'dots' all around. For variety we ensured that each patch of color had a unique cluster and color.
Flower colors:
We used red, purple, orange, blue, yellow and white. White was added to our colors for tinting and softening our colors.
Additional clusters of flowers were painted at the feet of our chicks to give some visual weight to our composition and to create a sense of foreground.
Border: The best part - we peeled off our washi tape to reveal our crisp border. And done!
For a video tutorial, visit my YouTube channel here:


