 |
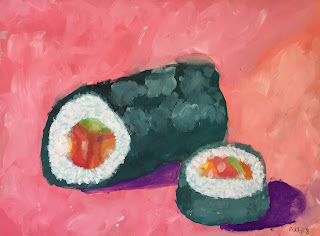
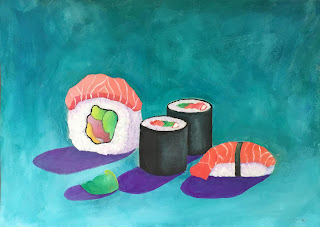
| Teacher Sample |
We had recently started exploring gouache, one of my favorite mediums. I knew I wanted to this to be a gouache project, because of the ease with which you can layer and blend colors.
We painted these on posterboard, but any medium weight paper would do, like watercolor paper or tagboard.
Objectives:
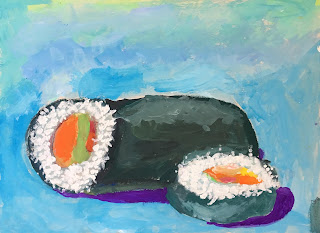
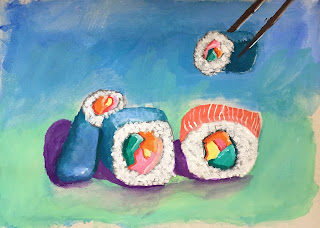
-For my younger group (ages 7-9) the objective was to draw two different pieces of sushi, at least one with sushi wrapped on the outside.
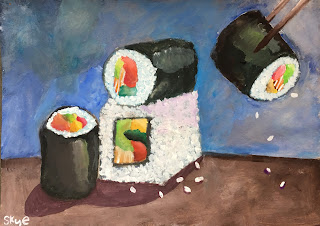
-For my old kids groups (ages 8-14) the objective was to draw 3-6 different pieces, at least one with sushi on the outside.
-Sushi should be overlapping
-Sushi should look realistic, with proper form and dimension.
Step 1
Sushi compositions were drawn in pencil. I demonstrated how to draw the cylindrical rolls and the discs. Students had many visuals of sushi at their desks, so they could see the variety and options for fillings and styles.
Step 2
We painted the background in a 'stippling' style. I demonstrated how to use their brush in an 'x' motion, dipping their brush in two similar colors plus lots of white, and not over-mixing or over-blending. The goal is to end up with a textured looking background.
Step 3
We began by painting the seaweed of our sushi. I demonstrated how to paint the base color of their seaweed using a mix of dark green, dark blue and a tiny bit of black (for that perfect seaweed color), and then adding a bit of white to our unclean brush and dabbing this white onto our seaweed where there is light. This is easy to do with gouache. The white will mix and blend with the base color underneath it, and you end up with a softly blended lighter value. Again, students used a stippling motion to softly blend their colors, careful not to over-blend.
Step 4
Students began painting the inside filling portion of their sushi. Student had to consider both shadow and light for every single filling element.
**For example, their 'salmon' is orange, but it will have a darker shadow area (red-orange or red), and a highlight area (a tinted orange, created by blending white over top of the orange.)
Cucumber, avocado, tuna, omelette.... all have a shadow and light side. This give us incredible dimension and a realistic touch.
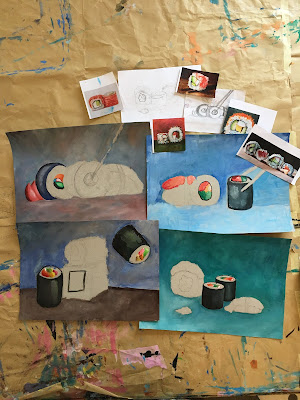 |
| End of day 1 |
Step 5
Painting the rice.
This was fun. I demonstrated how to paint the base color of the rice in a VERY soft grey or light bluish white. Then, with a small square brush, we dipped our paint in pure white and dabbed on little rice shapes. We let our flat, square brush do the work. We dabbed dabbed dabbed, all around the base color of our rice, until it was full of rice kernels. We made sure these kernels went in every direction, and were nicely overlapping, but still allowing some of the base color to show through between our kernels, for that shadowing look. We made the rice expand slightly beyond the edges of our seaweed to make it look like it was really busting out of the roll. Yum!
Step 6
Shadows
We do not want 'astronaut' sushi, aka, sushi that's floating in space. So, we added shadows underneath our rolls. Purple is a great shadow color because it's cool and dark but not overly dark. We determined where our light is coming from and painted our shadows in, going back in the other direction, and mimicking the shape of our sushi rolls.
My kids were stunned by the realism they were able to achieve. I was floored by their results. Gouache is truly a wonderful medium. It allows for such easy blending and layering. The dimension, the texture and the detail of these sushi is just incredible. I'm so proud of these kids! And now I'm hungry!
This project took two 90-minute classes. All my kids, ages 7-14, LOVED it and went home SUPER proud.
 |
| Thursday kids ages 7-9 |
 |
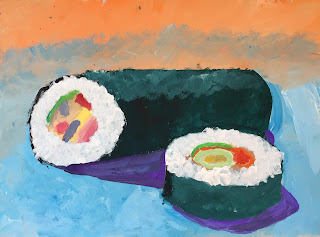
| Sunday kids ages 8-14 |
 |
| Tuesday kids ages 9-11 |


