|
| Jim Dine |
 |
| Jim Dine |
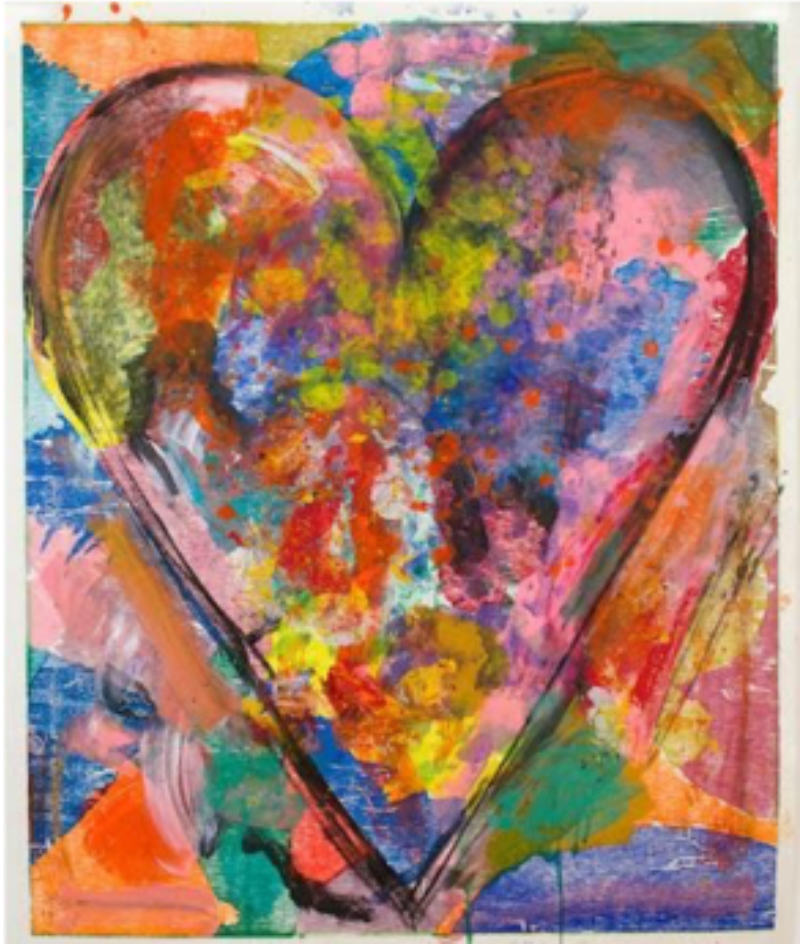 |
| Jim Dine |
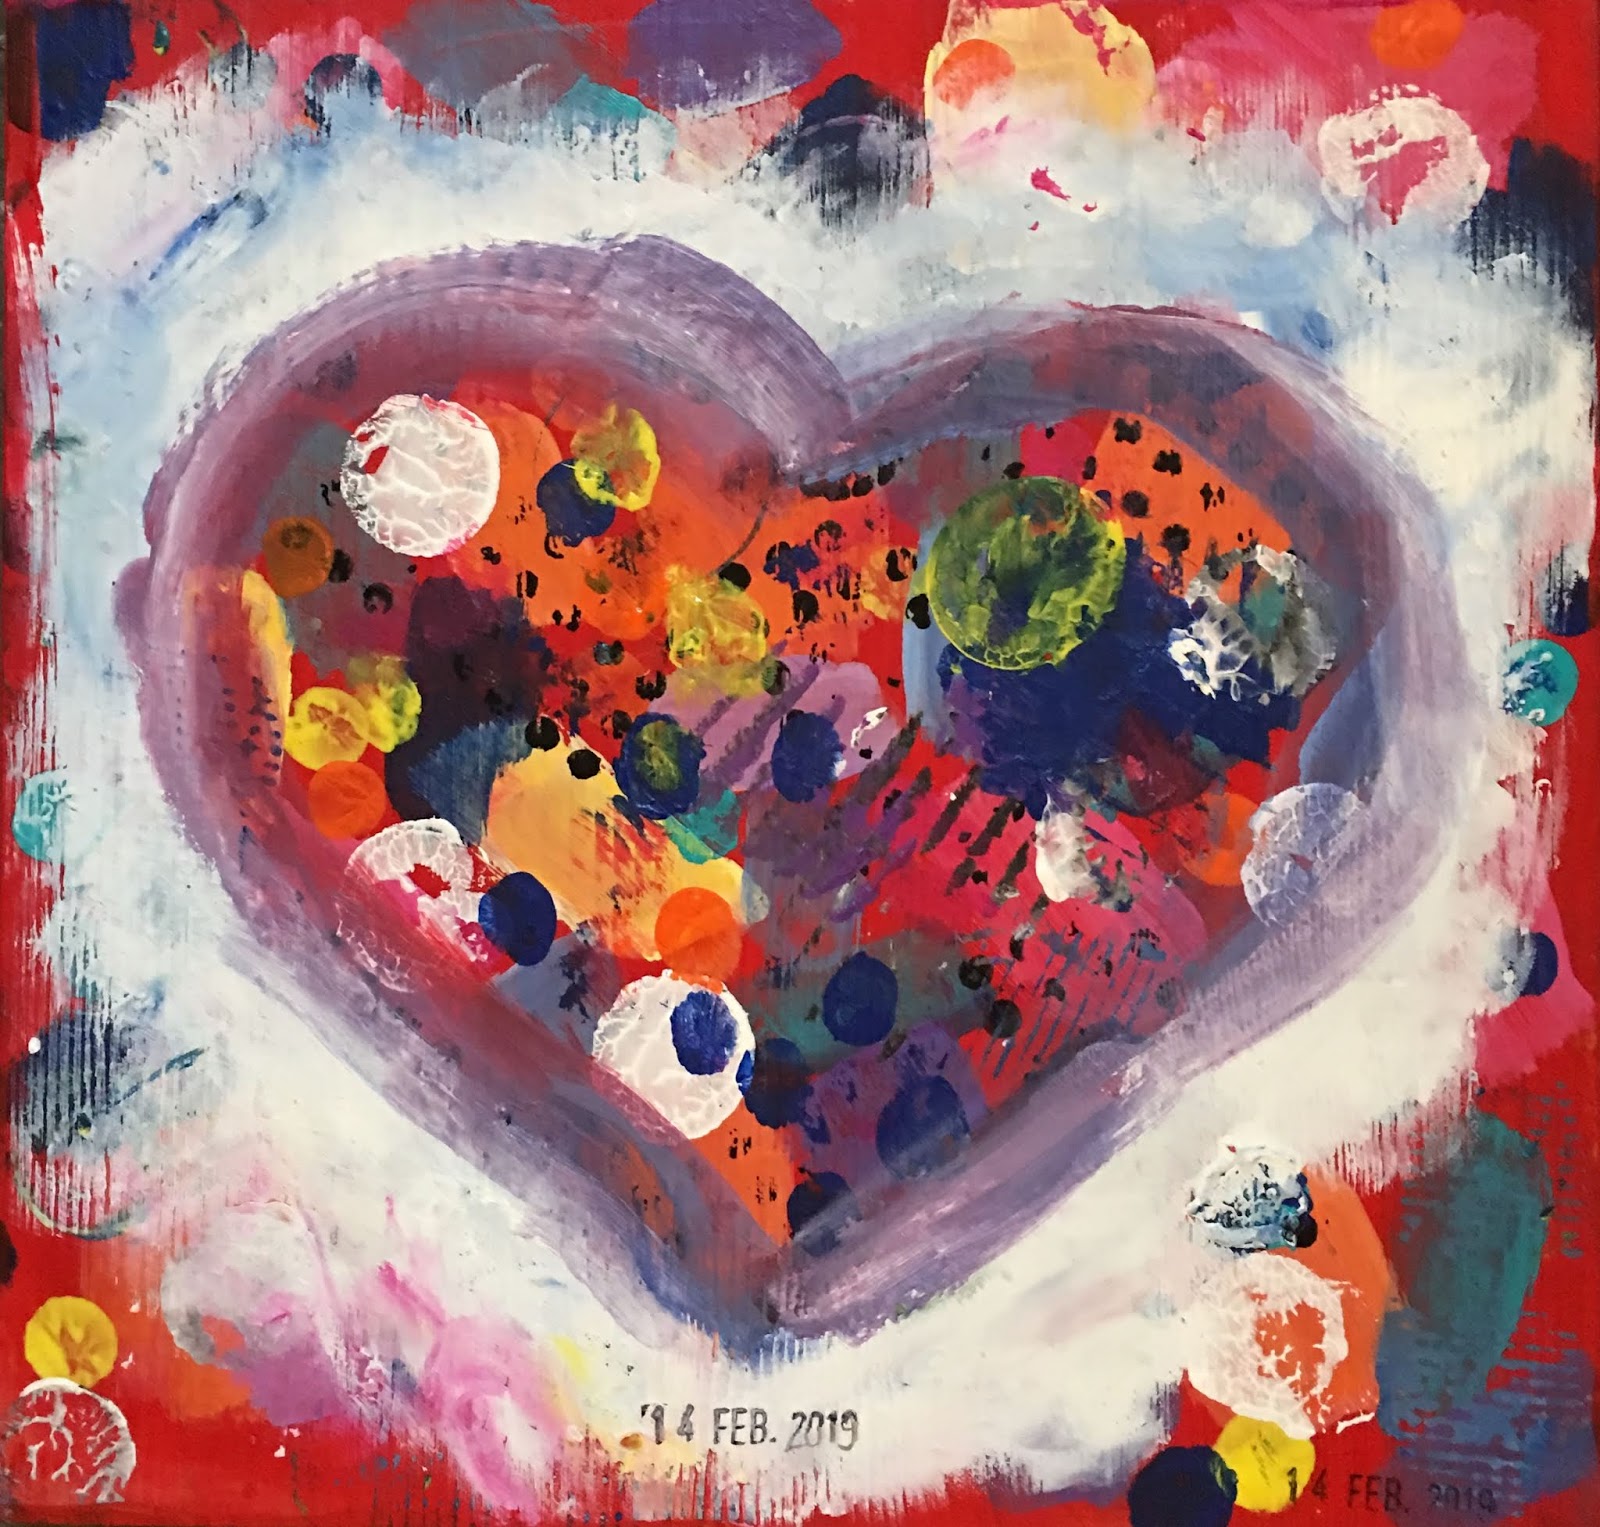
Hearts are on overdose around Valentine's day. Generally, I stay away from this saturated symbol but this year I decided it was our time we had some fun with hearts in the art room. Looking for something cool, rather than sweet, I discovered and fell in love with Jim Dine's hearts. They are bold, expressive, daring and drippy - the bad boy of hearts. This was the inspiration for this Jim Dine Negative Space Heart project.
This project was designed for my 7-9 year olds, and to be completed in one 90-minute class.
We used 20x20 wooden boards and acrylic paint. Actually, these boards are from a wooden shelf I had cut down to square formats at the hardware store. Way to recycle!
Underpainting: We began by painting the surface of our board red. We blow dried these.
Mark-making: Students were given a palette of warm colors and white, and created tints of these. We painted splotches of these colors all across our board. Tints stand out better again the red background, and create nice contrast.
With a palette of tinted cool colors (blues, turquoises, greens), we stamped all kinds of marks on our board. We used found objects for this: corrugated cardboard, wine corks, legos, tape rolls, bubble wrap etc.
We went for variety and repetition, so lots of different marks, but repeating them here and there for harmony.
With a tiny bit of black, we create a few very small black marks, using small stamps (small wooden pegs, game pieces, lego pieces, or a small ring stamper). This contrasts nicely with our other colors, but we are careful not to use too much black. We dried this.
Heart tracer: I had created heart tracers with card stock. Students placed a heart tracer in the center of their board.
Negative space painting: Holding this tracer tightly in place, they brushed around the edges of it with white paint in a dabbing brush motion. The paint shouldn't be too thick. A light coat is best, so we can still see all the colors and marks underneath. We did not paint white all the way to the edge, but only created a fluffy contour to our heart. Lifting up our heart tracer revealed the heart with all our colors and marks inside, and the white contour. For added emphasis, some students added a tiny bit of black or another color along the inside of the heart. Careful not to use too much black here, and not to over emphasize the heart with another color either, or it upsets the subtle balance of colors and the natural contrast from the white contouring.
As final touch, we used a date stamper and stamped the date somewhere on our board: 14 Feb 2019. Valentine's Day!
These are so bold and expressive. A hanging nail can be nailed into the back of the wood and these beauties can be displayed on the wall!
 |
| Underpainting our wood board |
 |
| Painting dabs of color on our underpainting |
 |
| Proud little artists |