Somehow I landed on a cactus trajectory after the summer vacation (seems fitting, I guess), and I had the urge to do cactus projects with all my age groups. The focus in the Art Room after the summer was on on line and watercolor, and a cactus project would allow me to bring both these ingredients to fore nicely.
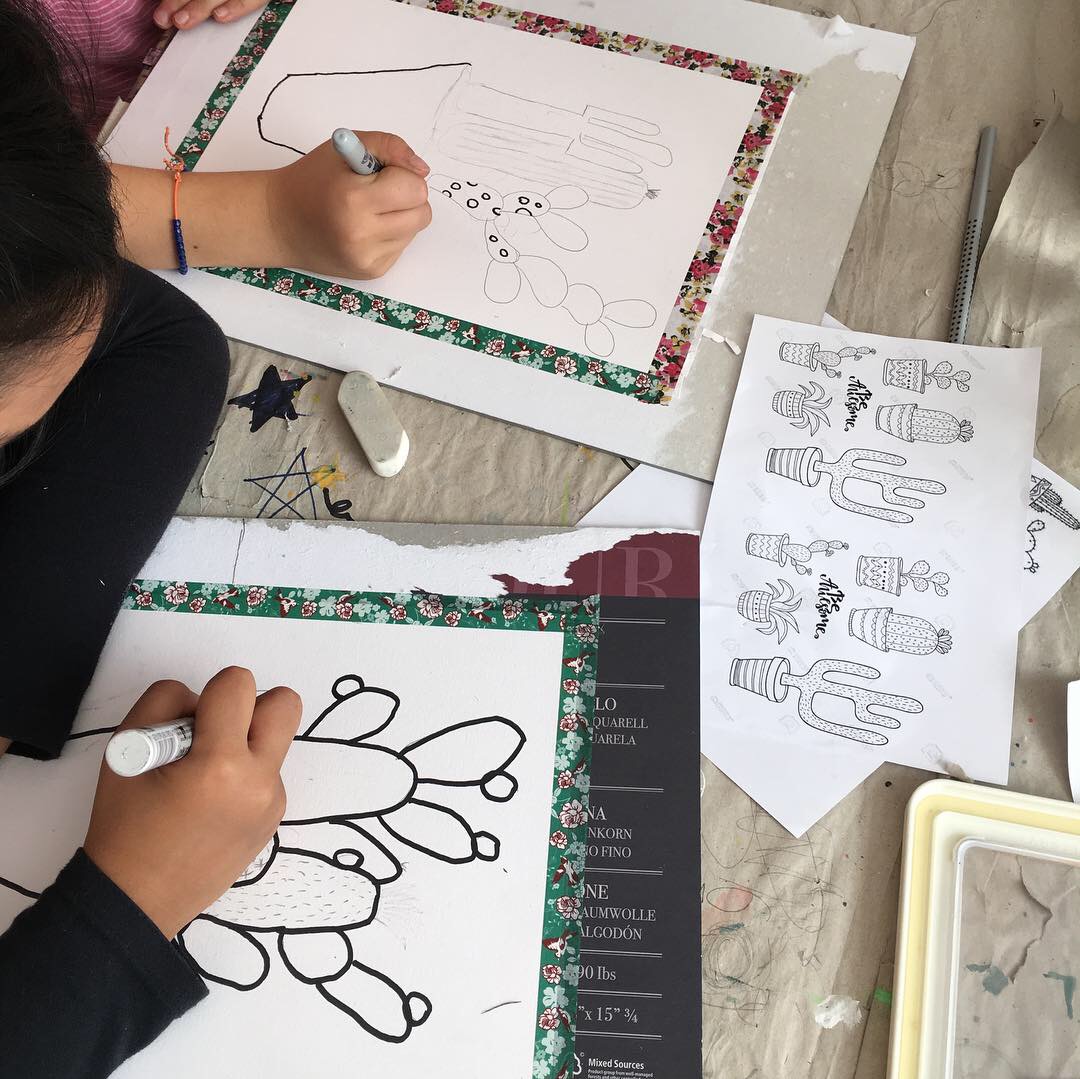
For my 7-8 year old age group I opted for a potted cactus with simple patterned pot. The key to this project is outlining the objectives and requirements clearly and working in a step-by-step manner. So here they are:
Objectives:
- Draw 3-5 different cactus varieties in pencil, with some overlapping. Smaller ones in the front, larger taller ones in back. There must be variety in cactus shape, size, hight, width; cactus prickles and hairs should vary too (some could be dots, dashes, v-shapes, x-shaped, etc). *We had tons of visuals and illustrations of different cactus varieties to work from.
- Good Composition: meaning your cactuses must fill the page (but not go off the page). Smaller ones in the front, larger taller ones in back. Cactuses should head towards the right and the left of the paper (radial composition), not just be in a crowded, vertical bunch in the center (bad composition).
- Pots with Form: pots or vases must be drawn to indicate they have form, meaning the top opening curve should mirror the bottom curve. Patterns inside the pot must also follow this curve, so the pot takes on the illusion of a rounded form. *After a few demos on the white board, and some practicing on their scratch paper, the kids got this idea down easily.
- Finer-liner marker width variety: we used different marker widths throughout when tracing our pencil lines. Cactus contours were wider (0.5 fine liner), and details (such as flowers, prickles) were smaller widths (0.05, 0.1, 0.2, 0.3 width fine liners). Our pot contour was also wider than the patterns inside out pot. *This little details results in a much finer, cleaner composition, with emphasis and visual rest. Too many black lines of the same width is overwhelming to the eyes, and confuses the viewer because there is no emphasis.
- Patterns: these should be simple and should involve repetition (hence, pattern). *I had many visuals and examples of simple patterns they could explore.
- Pattern Colors: choose 3-4 colors and repeat these colors in a patterned way in your pot. *We used permanent sharpie markers for our pots because I knew the rest of our drawing would be painted with watercolor and I wanted to avoid any marker bleeding.
- Wet-on-wet watercolor painting with attention to highlight and shadow sides of cactus paddles: Very light washes of blue, green and yellow mixes were dropped into out paddles wet-on-wet, and darker values were added to our shadow sides. *To prevent our colors from bleeding together across different paddles, we skipped around when painting, always leaving an unpainted area between our recently painted areas. The kids had fun mixing blues, greens and yellows. Purples was thrown in there too. Sand was painted in brown. Flowers were painted and refined with colored pencil.
- Background: Our backgrounds were painted wet-on-wet in a very light wash of a warm color to off-set our cool cactus colors. Some chose to use the dirty water from their water container, which was a murky, neutral color from all the color mixing we did.
- Taped Borders: with most watercolor projects we do, I like to tape borders. It contains the paint nicely and leaves a clean, crisp border.
We loved this project, and honestly, the kids really enjoyed the meticulous attention to detail, using different fine-liners, the color mixing and the mixed-media component.
 |
| Day 1 |
 |
| Work in progress |
 |
| Age 7 |
 |
| Age 8 |
 |
| Age 8 |
 |
| Age 7 |
 |
| Age 8 |
 |
| Age 8 |