These batik fall veggies were done in 2018 by my 6-11 year olds, and my 4-5 year olds, a few years back using oil pastel. I did this project again recently with a group of 7-8 year olds and tried a different medium - crayon. Both oil pastel and crayon work really well for this process.
Process
Draw:
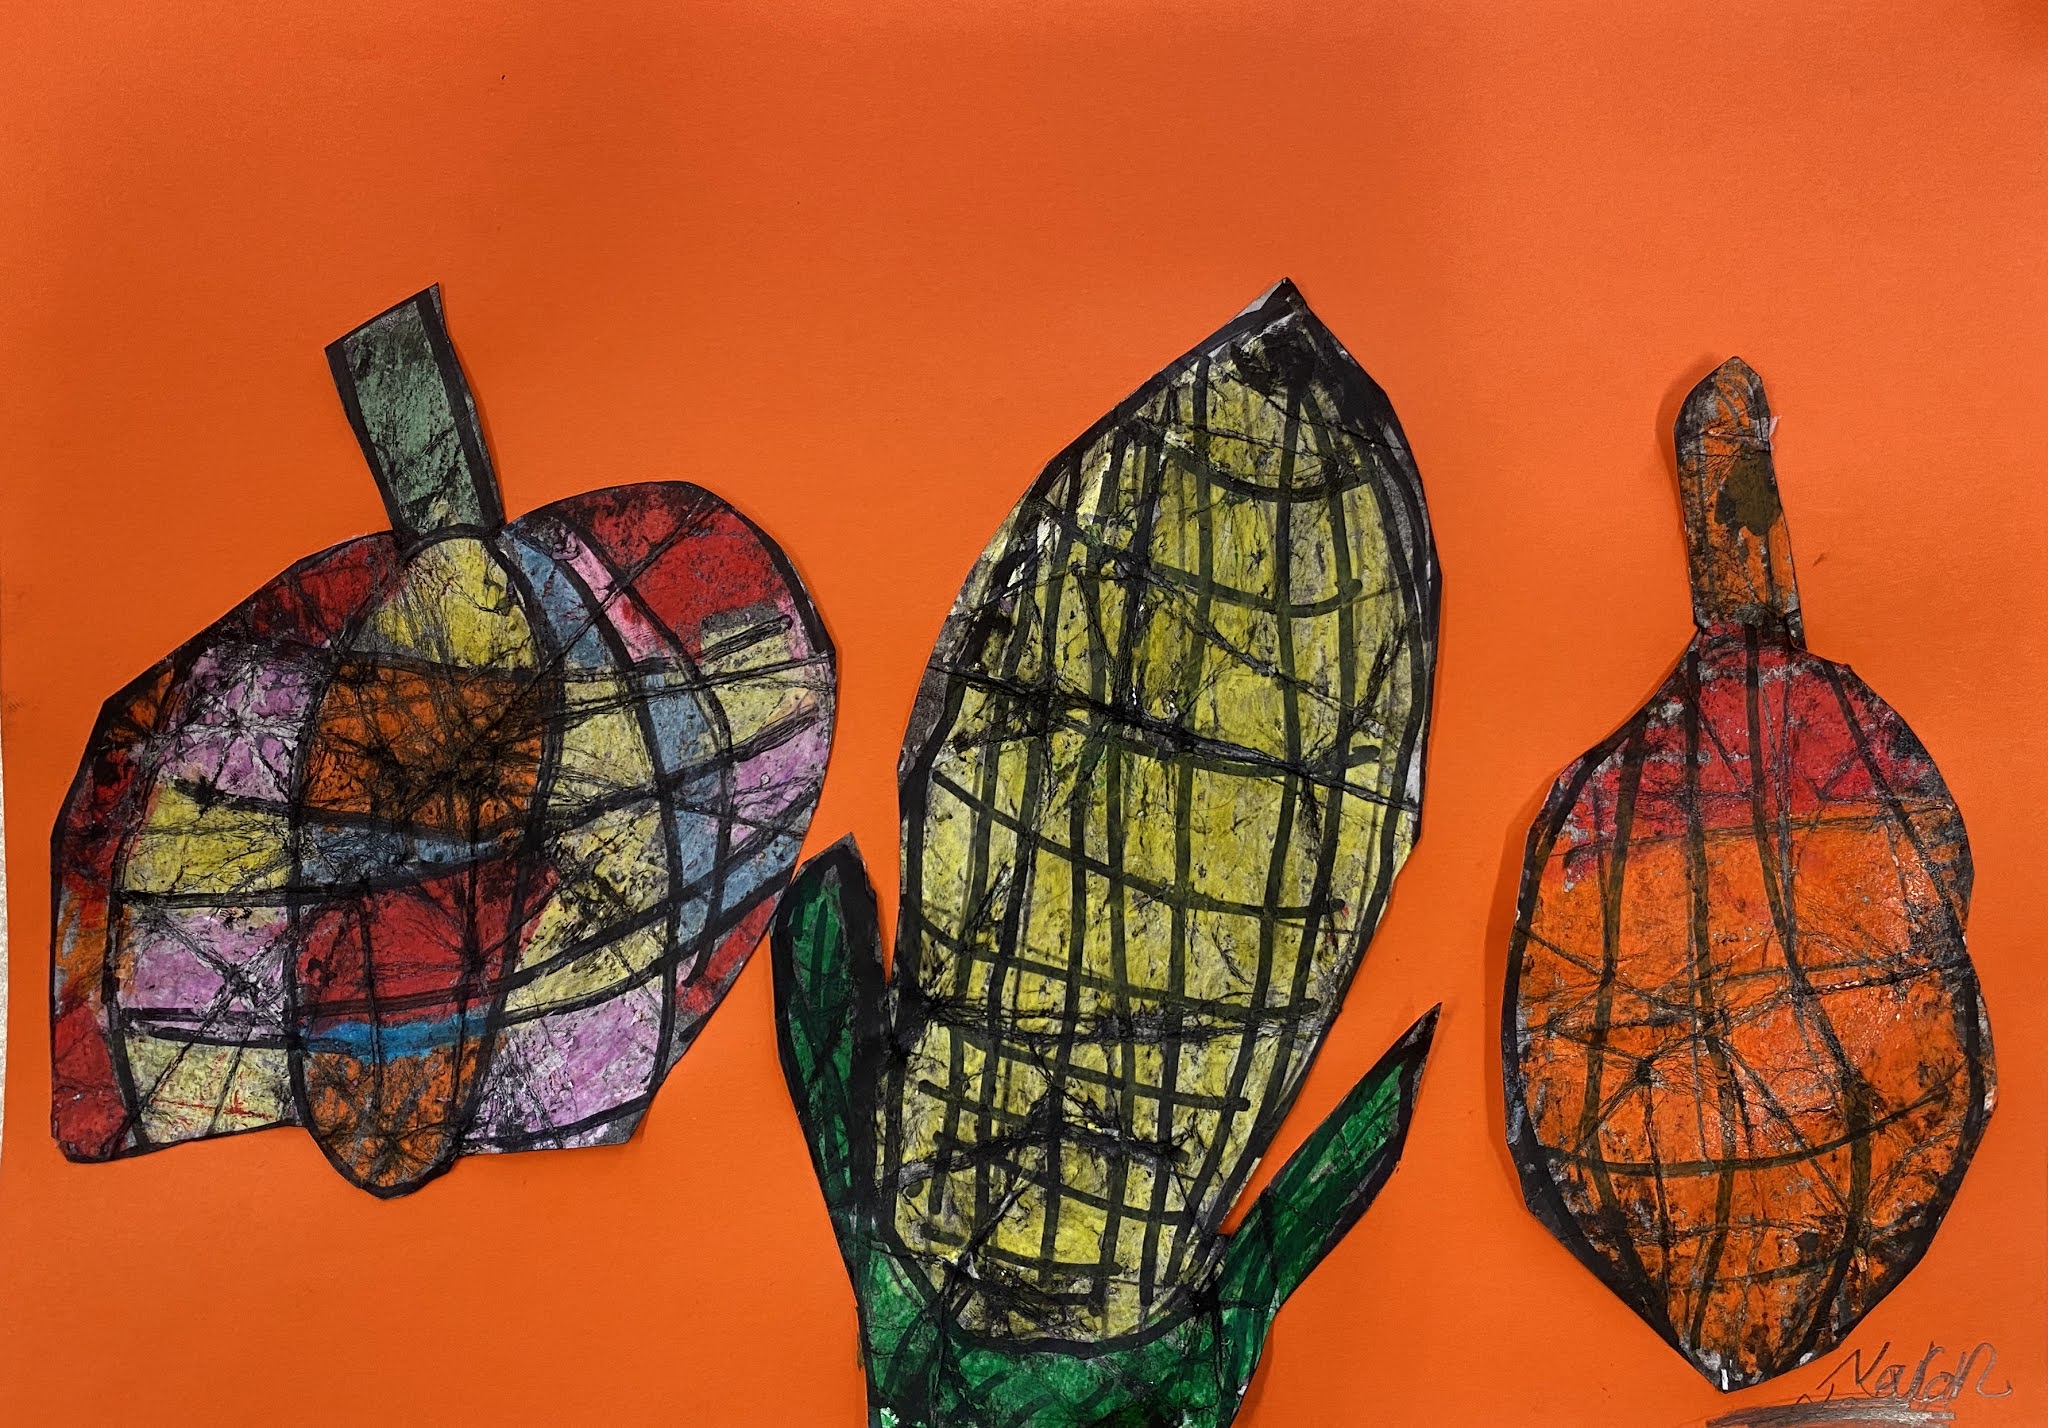
Kids draw 3-4 fall veggies (gourds, pumpkins, corn, squash). They draw by observation from photos and real veggies. Each veggie is drawn separately on medium weight mixed-media paper. Printer paper will be too thin, as the paper will get quite wet and worn in this process. Lines are drawn vertically down the veg, following the shape of the veg in order to create a sense of form. Then lines are drawn horizontally, also following the form of the veg (so for a pumpkin, lines would be slightly curved because the pumpkin is round). You will end up with a veg that is checkered. Main contour lines (corn husks, outer lines, segment sections of pumpkins) may be traced in black permanent marker, which creates more contrast later, but this step is optional.
Color:
Each checkered box is then thoroughly filled with fall colors in oil pastel. Colors should be repeated throughout the veg in different areas for good balance and harmony. The best way to do this is to start with one color, red for example, and color a few red squares in your first veg by bouncing around to all sides (top, bottom, middle, etc ), then take your next color (orange for example) and color a few squares orange. Then follow the same approach with yellow, green, pink, etc....until your veg is filled with color and your colors are distributed in a balance way.
Batik:
Counter-intuition can be a frightening and thrilling thing. Student are asked to crumple their veggies as tightly as they can, like making a ball out of paper, careful not to tear or twist it. Some students were nervous about this, but they jumped in anyway.
Papers are opened up again and laid flat. Students can even step on their crumpled paper for more pressure - they love this! Then, with a flat brush and very opaque black watercolor, students paint over their veggies. The black paint resists the oil pastel, but seeps into the white paper that is created by the folds from the crumpling. The watercolor may be wiped away with a moist towel, or even run for a second under a sprinkle of water at the sink. The veggies take on a batik look. These are laid aside.
Background:
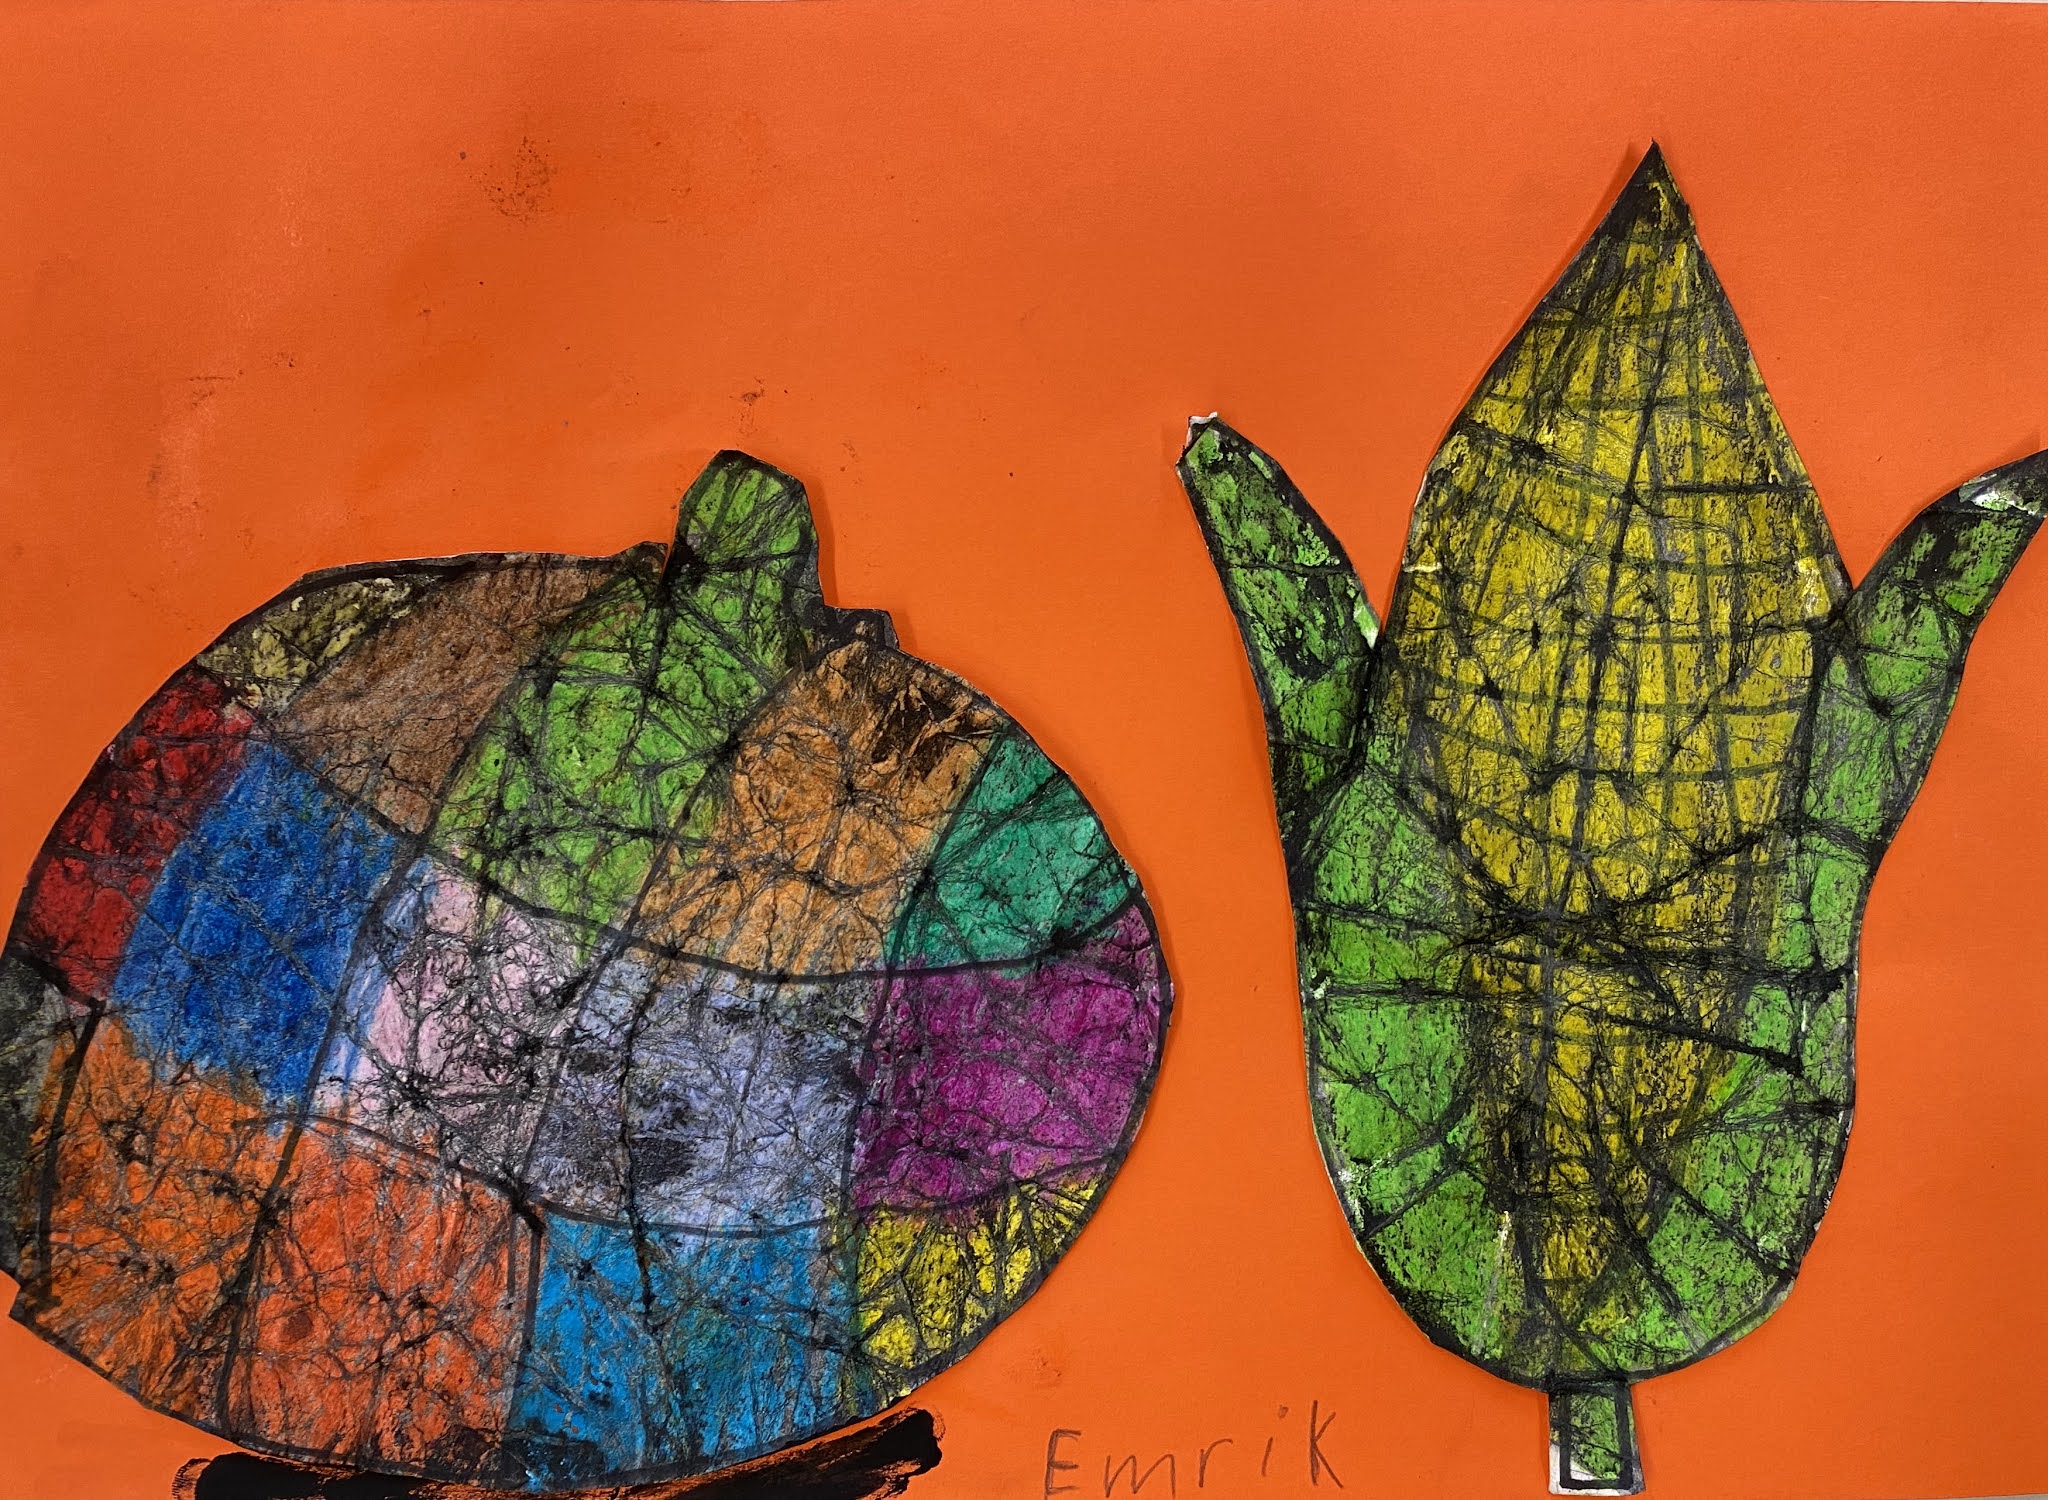
Students trace a few fall leaves with a pencil on regular printer paper. We used real fresh leaves, but you could use tracers. For visual rhythm and more visual interest, leaves should face in different directions and be different sizes. These are then colored in cool colors with watercolor. The negative space around the leaves is painted in warm colors. Once dry, this paper is then crumpled and laid flat again.
Collage:
The veggies are arranged in a visually pleasing manner on the leaf background. At least two veggies should overlap, but preferably all. Generally, kids have a decent sense or pleasing composition, but they might need to help with this
Final batiks are then pasted on black paper, for that bold black border.
My little class (4-5 year olds) only drew two veggies, and skipped the leaf background part and just pasted their veggies on black paper.
The samples at the bottom of this post were done in 2020 in crayon, and pasted on colored paper. I think oil pastel might give you bolder results, but both crayon and pastel work really well.
Super fun, and lots of learning in this project!
7-11 year olds. Oil pastel and watercolor background,


 |
| 4-5 year olds. Oil pastel |
7-8 year olds. Crayon