
 |
| Teacher Sample |
 |
| Teacher Sample |
 |
| Teacher Sample |


We took inspiration from different hand puppets we found on the web, in addition to the puppets German-Swiss artist Paul Klee made towards the end of his life, together with his young son. We were going for something realistic though, and wanted to think about creating a head shape that includes a defined facial bone structure. This means: thinking about brow bones, nose shaft, cheek bones, chin shape and eye sockets. We looked at pictures of simple bone structure illustrations, and felt our own faces to 'feel' the cures and indents in our faces.
We then decided if we wanted to create a female, male, old or young puppet, and aimed to give our puppets a bone structure that fits this profile.
Bone Structure Differences:
Men have broader noses, stronger brow bones, larger and squarer chins, wider mouths and more set back hairlines. Females have smaller, more delicate and more rounded features, narrower chins and higher cheekbones. Children have rounder faces, bigger eyes, fuller lips, smoother skin, freckles. Older people have longer chins, longer noses, rougher skin..... these are, of course, all slightly hyperbolic samples, but still, they get the job done in helping to achieve a certain type of look.
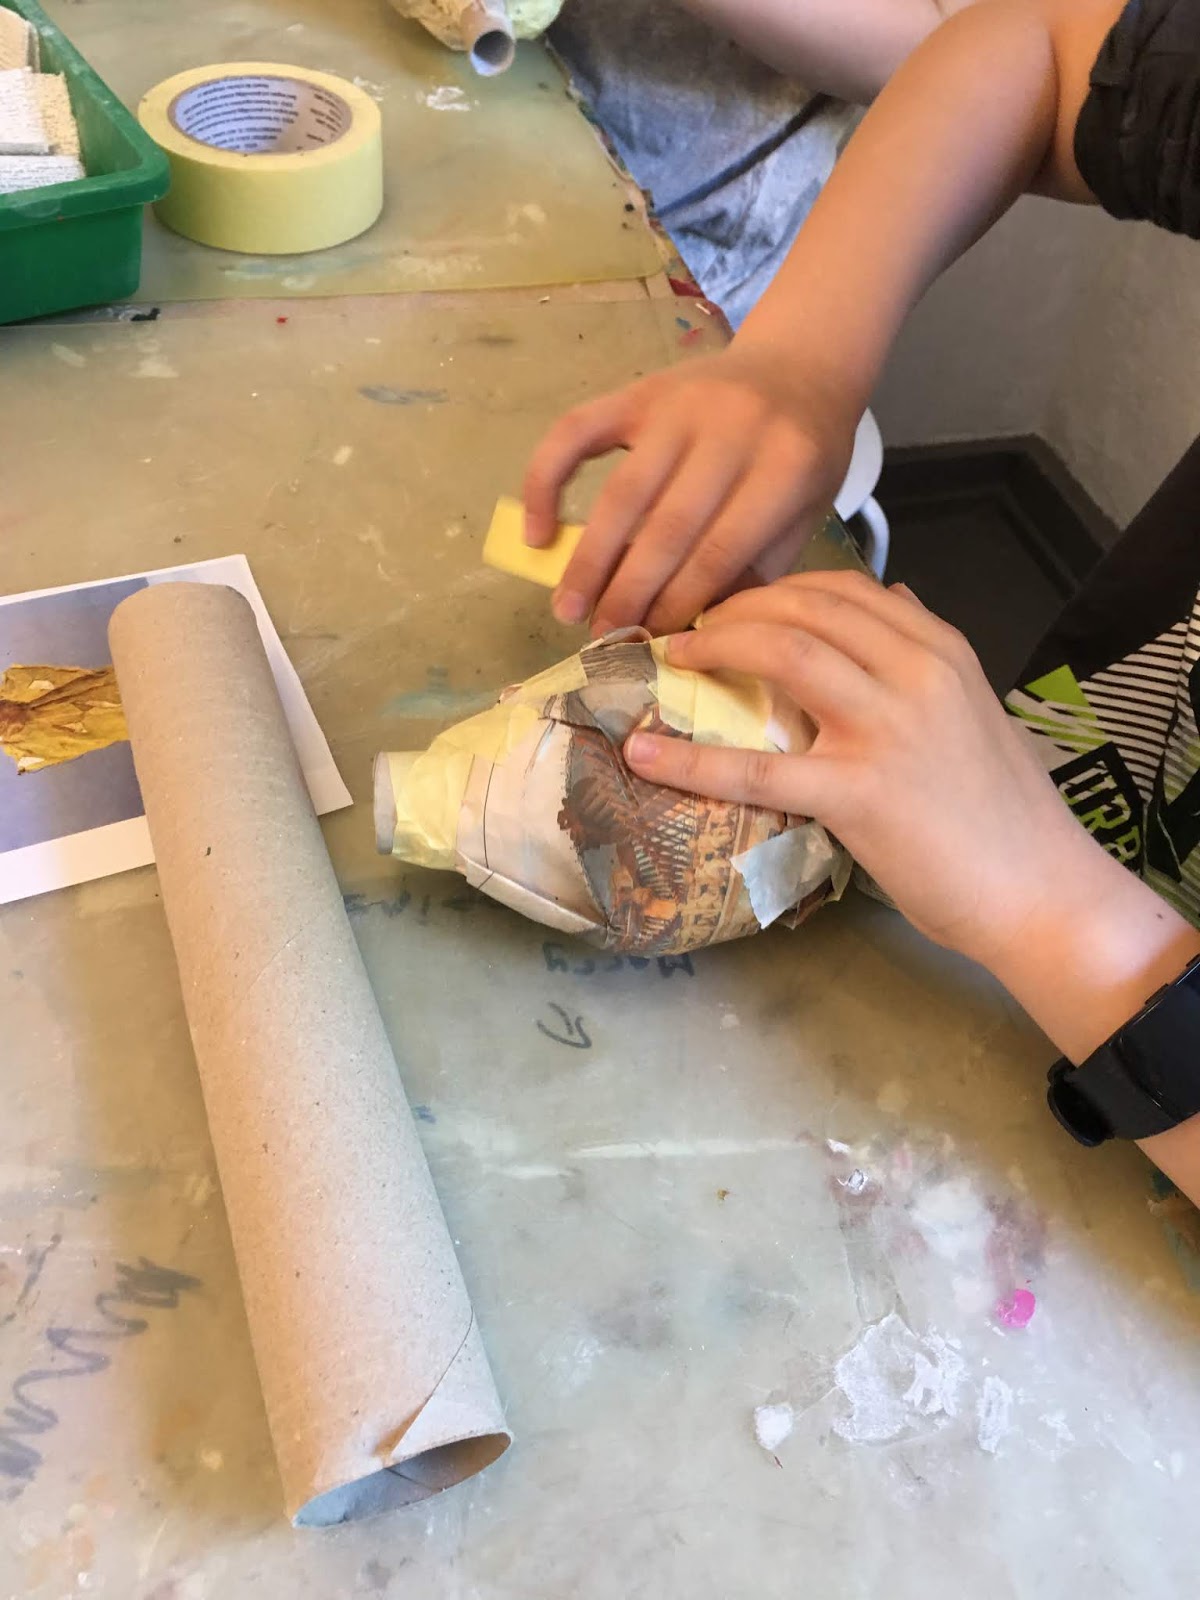
Students created a neck out of toilet or kitchen roll - wide enough to fit at least two fingers into it. They then bunched newspaper into a softball sized ball, and started pushing paper down and pinching it up, and adding more bits of newspaper to create their facial bone structure. Clearly defined noses, brows, chins, cheeks and eye sockets had to be created. They taped everything down with lots of painters tape, to keep everything in place and to make a good, solid head. The neck was inserted into the newspaper head. These were securely taped together.
We covered our head and necks with plaster strips. We continued to develop our facial bone structure in this step, adding lips, nostrils, and any other features using plaster. These dried until next class.


Painting the face:
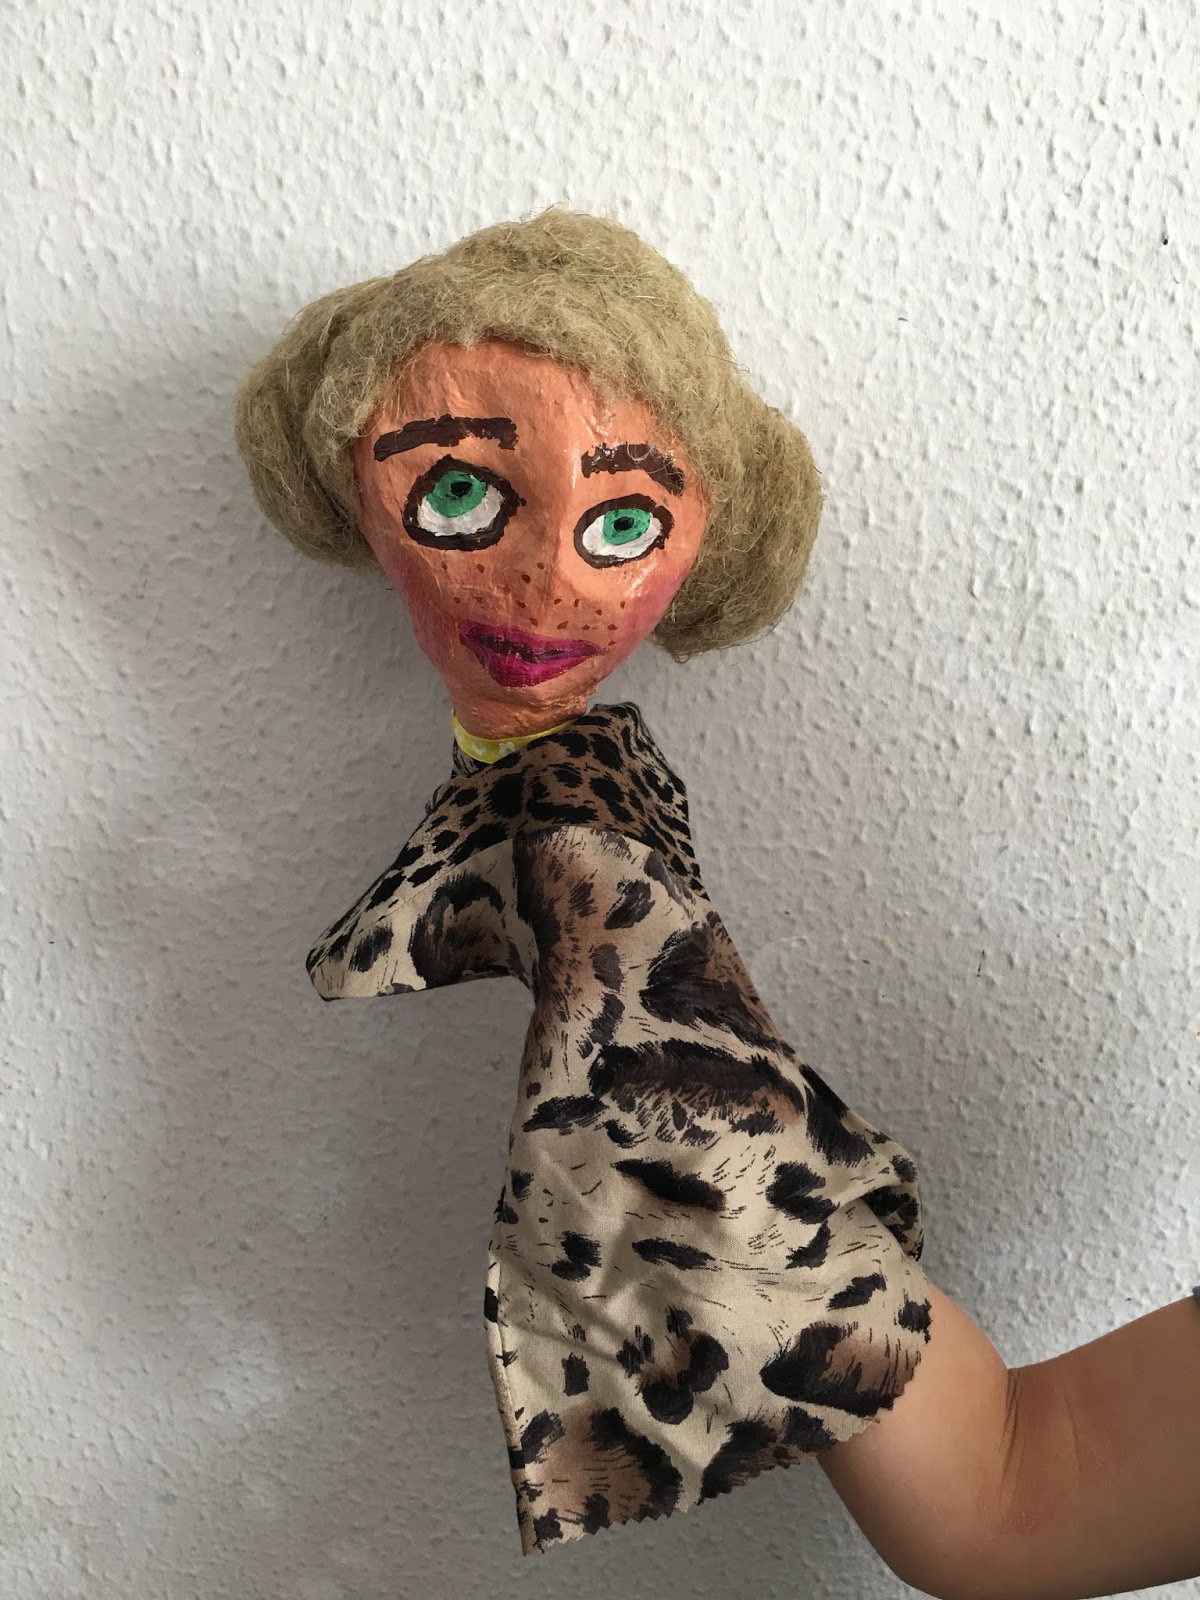
Students mixed their own skin color using acrylic paint in pinks, yellows, browns, ochres, and white. Faces were pained, and cheeks were given a splash of color. With a fine detail brush, students painted eyes, brows and lips. Lots of attention was given to neatness and precision in this step. Special care and attention was given to the eyes and the iris, to achieve a realistic and expressive look. Eyebrows were painted mindful of the expression created with differently shaped, placed and sized brows.
Preparing the puppet dress:
Students chose fabric for their puppet's clothes. Using a simple dress pattern I created, they cut out a double piece of fabric for the front and back. Some students sewed these two pieces together at home during the week. For those who do not sew, I sewed their puppet dress myself and had them ready for them on our last class.


On our last day, we put everything together. We added hair, clothes and any other accessories, such as glasses, pockets, ribbons, bow-ties....
Hair:
Students could choose from a coarse hemp (which I had saved from packaging insulation), or yarn.
-Hemp was piled onto the head and formed into a hairstyle, then glued down onto the scalp and hair sprayed for a secure fit.
-Yarn was more complicated: we wrapped yarn firmly and evenly around rectangles of cardstock and secured our wrapped yard with tape. Using the sewing machine, we sewed up and down twice along the middle of the cardstock to create the 'hair part'. We then clipped the edges of our hair and carefully tore away the cardstock. We placed the hair on the puppet heads, and glued the hair line down with a glue gun. Hair was braided or gathered into pigtails, and secured to the head with a glue gun.
Dresses were fit around the neck of our puppets and secured with a glue gun. Collars, bow-ties, neckties, ribbons, and hair wraps were added. For those who had time, wire glasses or monocles were created.
These puppets turned out so beautifully! The attention to neatness and expressiveness really make them professional looking little theatre puppets. We all had such a blast creating these!


