Tuesday, April 16, 2019

Gray-Scale Dogs

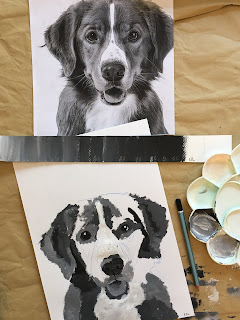
Teacher Sample
Teacher Sample


We all love dogs, don't we? Everyone has a deep connection to some dog, or another. Man's best friend was our subject for this value study.

I feel like I talk about VALUE all the time in the Art Room. It's such an important art principle. Without it, we wouldn't have form, dimension or contrast. Art would be flat, dull and boring. Despite my value obsessiveness, I don't think I've ever done a project with my students where value was the main prerogative. I decided to go for a grey-scale project, so my kids could dive in head first.

VALUE GREY-SCALE
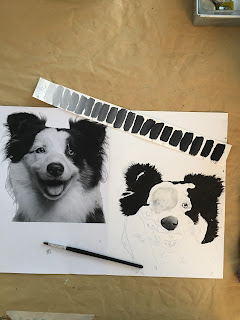
Students were given a long strip of watercolor paper and black and white acrylic paint. They were to create a value grey-scale from pure white to pure black. We started with only white, and painted a brush stroke of white on our strip. Then added the tiniest amount of black to our white paint and created a brushstroke of this color. Then more black, and more black and more black, until we were at pure black. Some students required 20 or more brushstrokes of color to get to pure black, others required only 10. No matter, we circled the 10 most evenly spaced exemplars from 1-10. These ten values would be our value scale.

REFERENCE PHOTO
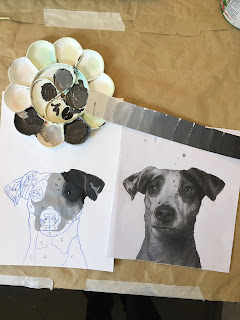
I printed out lots of dog portrait photos from the internet on regular sized A4 printer paper. I adjusted the size to make them as large as possible. Students chose their favorite dog. We had fun choosing the dog that best fits to us, our character, or somehow resembles us physically. This exercise resulted in loads of laughs. 
Sampling of reference photos
IMAGE TRANSFER 
Since this project's focus was on value, not on drawing, we traced our dog photo instead of drawing it out using the grid method. This also will give us super realistic results in the end, and feels a bit like putting together a puzzle with value. 
Transferring image with blue transfer paper
Contours and value shapes traced
We used transfer paper to transfer the photo onto our good painting paper (we used watercolor paper). We placed a sheet of transfer paper under our image and on top of our painting paper. Holding it firmly in place, we traced all the contours and details of our dog (head, ears, nose, eyes, etc) and then traced all the value shapes we saw. Basically, we looked at the different values as 'shapes' and traced these. We then numbered these values shapes 1-10, based on how they matched up with our value scale.

VALUE PAINTING
With our value shapes numbered, and with our value scale as our guide, we created grey tones with our black and white paint, and simply painted in our values. My students really enjoyed this process, and kept saying it felt like 'paint by number'. Except better, since we created this 'paint by number' all by ourselves!
As always, special attention was paid to the eyes. Getting these right is so important. It's where the heart and soul of any animal is, and it's the feature that draws in the viewer. We used a small detail brush for this area.
Many students chose to start their painting with the eyes. From there, they either addressed values light to dark (1-10), or dark to light (10-1). Either way works. 


BACKGROUND
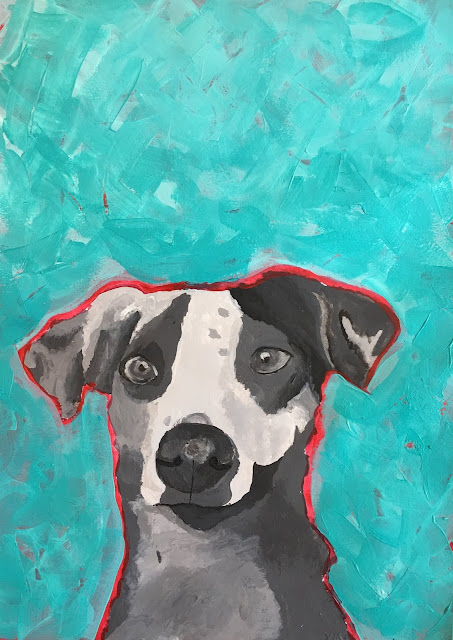
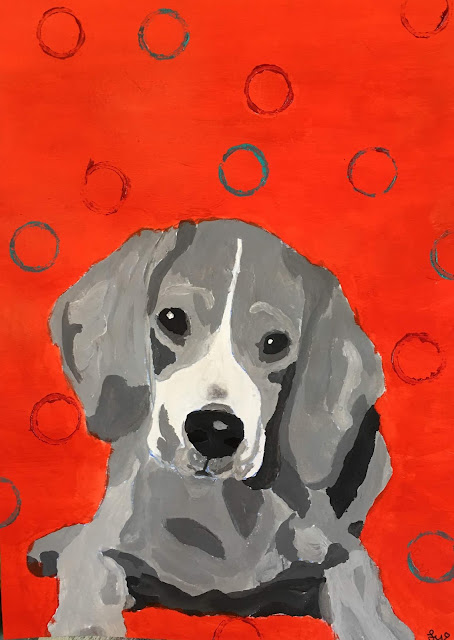
Backgrounds were painted in a bright color. Some students chose to paint in two colors or two layers. Some applied a solid, flat coat of color, others uses their brush in a stippling motion with two colors to create texture. Some students used a tape roll to stamp circles into their background.


Students were wowed by how realistic their dogs looked. I was floored by their results! Tracing the image, numbering the value shapes, and using our grey-scale as our reference, really made it all possible.

This project took two 90-minute classes.

age 13
age 10 
age 10
age 9
age 9
9-11 year olds
8-14 year olds


Thursday, April 11, 2019

Jim Dine Negative Space Hearts


Jim Dine
Jim Dine
Jim Dine

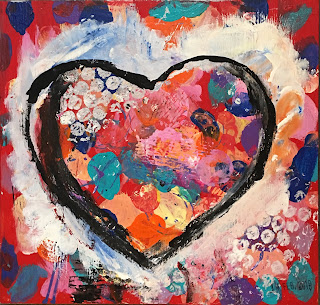
  Hearts are on overdose around Valentine's day. Generally, I stay away from this saturated symbol but this year I decided it was our time we had some fun with hearts in the art room. Looking for something cool, rather than sweet, I discovered and fell in love with Jim Dine's hearts. They are bold, expressive, daring and drippy - the bad boy of hearts. This was the inspiration for this Jim Dine Negative Space Heart project.

This project was designed for my 7-9 year olds, and to be completed in one 90-minute class.
We used 20x20 wooden boards and acrylic paint. Actually, these boards are from a wooden shelf I had cut down to square formats at the hardware store. Way to recycle!

Underpainting: We began by painting the surface of our board red. We blow dried these.

Mark-making: Students were given a palette of warm colors and white, and created tints of these. We painted splotches of these colors all across our board. Tints stand out better again the red background, and create nice contrast.
With a palette of tinted cool colors (blues, turquoises, greens), we stamped all kinds of marks on our board. We used found objects for this: corrugated cardboard, wine corks, legos, tape rolls, bubble wrap etc.
We went for variety and repetition, so lots of different marks, but repeating them here and there for harmony.
With a tiny bit of black, we create a few very small black marks, using small stamps (small wooden pegs, game pieces, lego pieces, or a small ring stamper). This contrasts nicely with our other colors, but we are careful not to use too much black. We dried this.

Heart tracer: I had created heart tracers with card stock. Students placed a heart tracer in the center of their board.

Negative space painting: Holding this tracer tightly in place, they brushed around the edges of it with white paint in a dabbing brush motion. The paint shouldn't be too thick. A light coat is best, so we can still see all the colors and marks underneath. We did not paint white all the way to the edge, but only created a fluffy contour to our heart. Lifting up our heart tracer revealed the heart with all our colors and marks inside, and the white contour. For added emphasis, some students added a tiny bit of black or another color along the inside of the heart. Careful not to use too much black here, and not to over emphasize the heart with another color either, or it upsets the subtle balance of colors and the natural contrast from the white contouring.

As final touch, we used a date stamper and stamped the date somewhere on our board: 14 Feb 2019. Valentine's Day!

These are so bold and expressive. A hanging nail can be nailed into the back of the wood and these beauties can be displayed on the wall!


Underpainting our wood board
Painting dabs of color on our underpainting

Proud little artists


Saturday, April 6, 2019

Gouache Teddy Bears


This project directly followed our Teddy Bears in Graphite project where students has observed changes in value and used graphite pencils to render these in their bear drawings. This experience of observation set them up for being able to paint a bear in a different medium. For this project I chose gouache because it's easy to blend the various values together to easily achieve form and dimension.

This project focusses on:

Observational drawing
Value
Form
Gouache techniques

Drawing
Students chose a photograph of a teddy bear to work from, and drew it out by observation by  breaking it down into basic shapes. To help us identify the basic shape break-down of our bears, we placed a small piece of tracing paper over our bear photo and traced the large, basic shapes: head, belly, legs and arms. This helps us see the individual parts of our bear better, without the obstruction of detail. We then drew our bear much larger on our good drawing paper, eye-balling our traced sample to help us get the shapes right. We drew "from out elbow" using large, repetitive, circular  strokes with a very light hand: round head, oval body, cylindrical legs and arms, etc. Students did not have erasers for this step, which encourages them to draw lightly, to 'sketch' out these basic shapes until they look right, and to simply ignore unwanted lines. Good lines were then drawn over to darken; superfluous lines simply ignored (they'd be painted over later anyway).

Identifying basic shapes
Tracing basic shapes with tracing paper


Background
Once drawn, students used blues, greens and white to paint the background. We used a 'stippling' approach in order to make it really textured. Using a flat edge brush, we used blues and greens and painted in an 'x' motion on our paper. Without rinsing our brush out, we dipped in white and painted more 'x' motions over top, which blends and brightens our blues and greens, creating tints.
Gouache is water-based, so paint can be reactivated. Brushing white over the blues and greens mixes and blends these colors together.
It's really important to not over-blend this step, as we are going for a textured look with some lighter areas and some darker areas.

Bears
Using a palette of brown, ochre and white we painted our bears. Each body part was painted one at a time. We started with browns and ochre, then added white over top for lighter values and blended into our brown, creating lighter browns and tints. Students explored ways to create fur texture with their brush. There was stippling, dabbing, and swirling the brush. We continued to add white to our lighter areas, and added dark brown to our darker value areas until we felt we had created all the values we see in our photograph. Students often had to be encouraged to go darker, or to go lighter. When they did, they instantly saw their bear develop more form and become more dimensional.


Shadows
Using a darker color from our palette we painted a simple shadow under the 'seat' of our bear, so he's not floating in space.

Details
Using a small brush we painted our eyes in black, our nose and mouth, complete with nightlights and shadows. Scarves, neck-ties and shirts were painted.


My younger kids (7-9) did this project in two 90-minute classes. My older kids (8-14) completed it in one 90-minute class.
Kids 8-14. Teacher sample top left.
Kids 9-11

Kids 7-9 with teacher sample top left