|
| Thursday Adults |
 |
| Tuesday Adults |
I prefer paper from older books, because I find the paper is often thicker, more textured, and yellowing.
Examples of my favorites are:
NEUTRALS
Old book paper (in various stages of yellowing; larger print and finer print; different fonts and languages)
Old dictionary or encyclopedia paper
Atlas paper and maps
Lined music composition paper
Sheet music (both in simple and complex compositions)
Gridded paper (math notebooks, drafting paper)
Bakers or deli paper
SOLID COLORED and PATTERNED
Gift wrapping paper
Decoupage paper
Colored construction paper
Origami paper
Homemade painted paper
Homemade stamped, stenciled, and printed paper
Now on to the project.
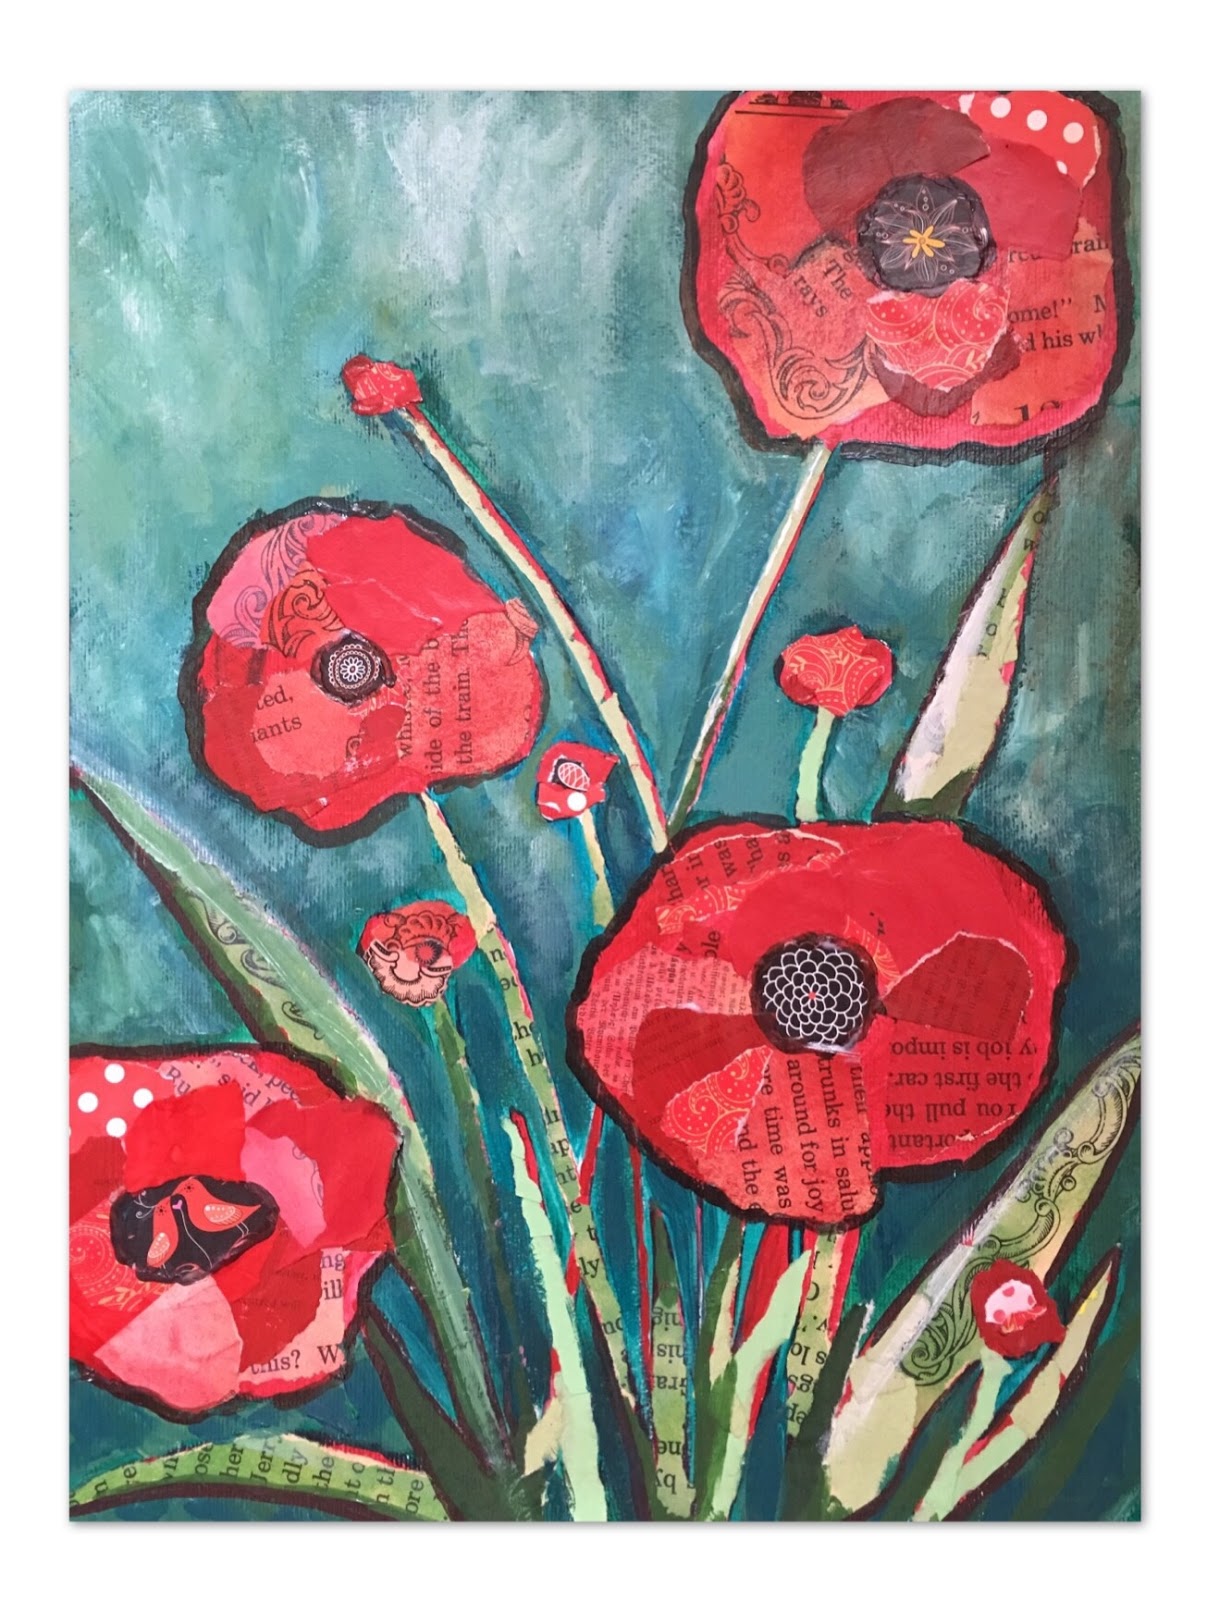
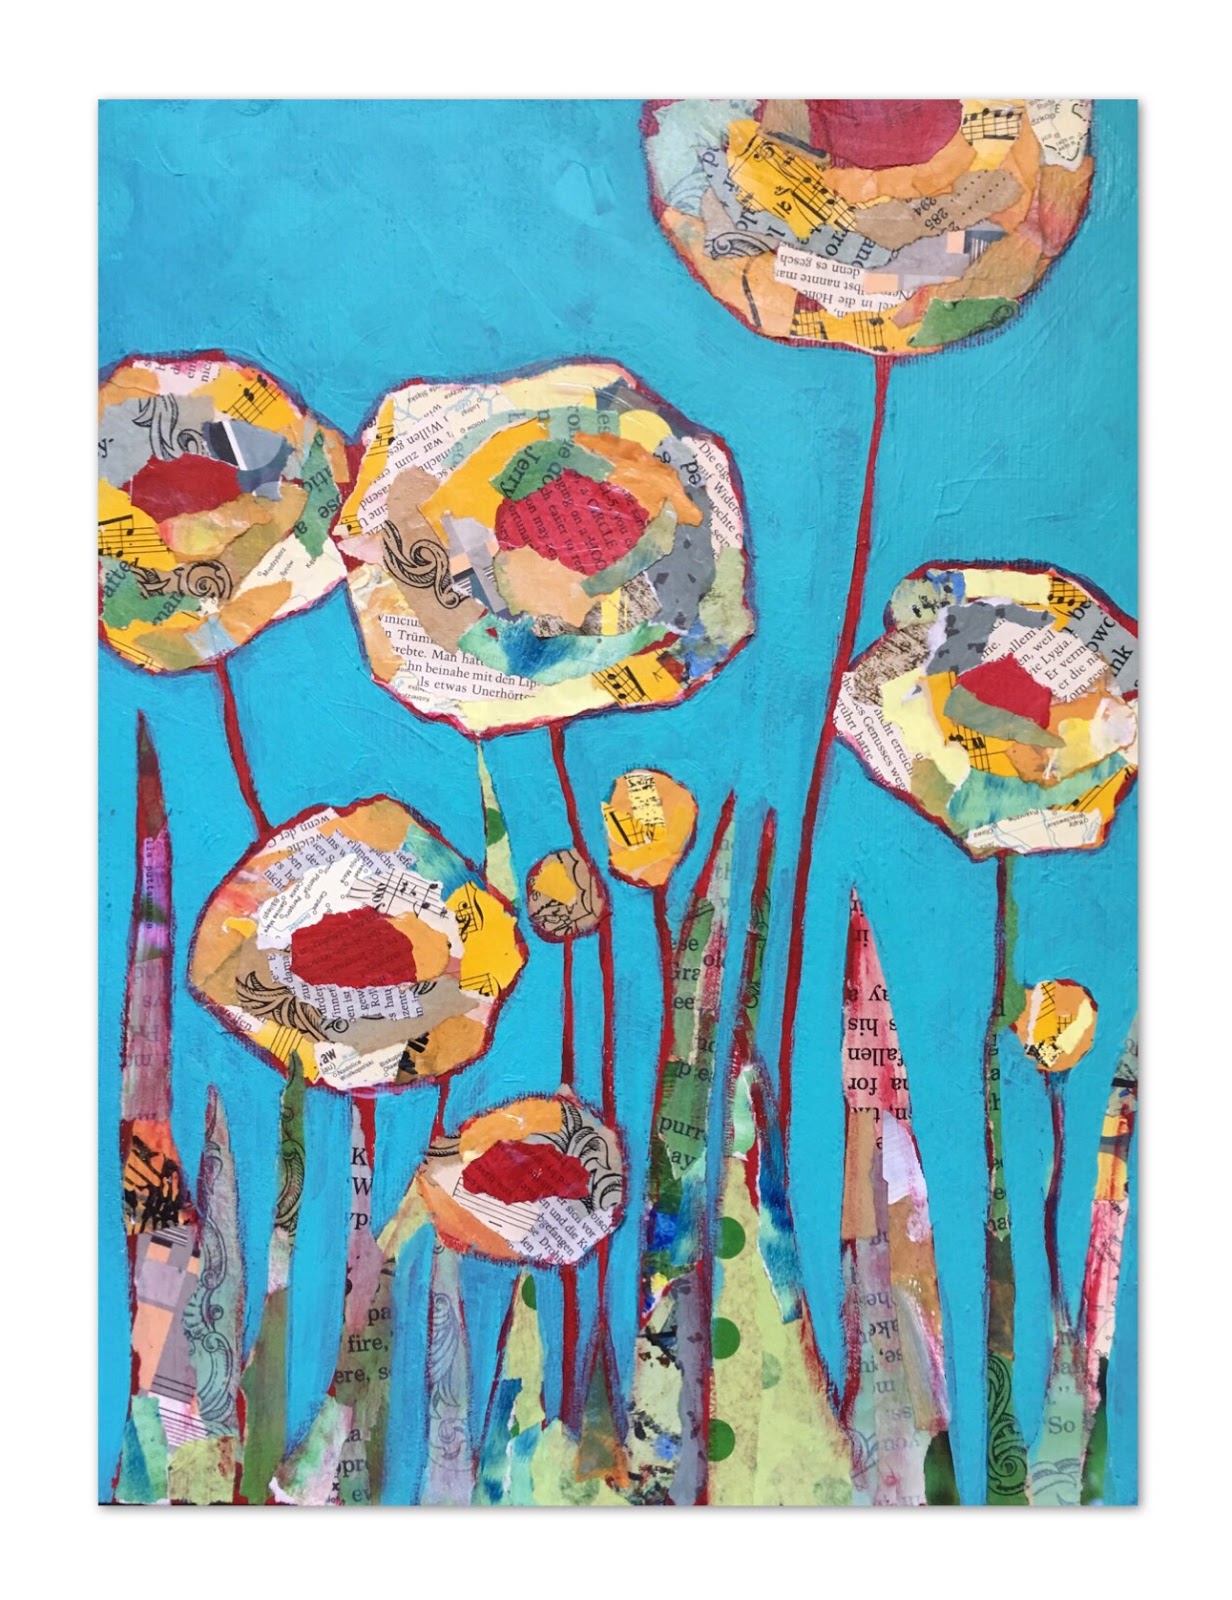
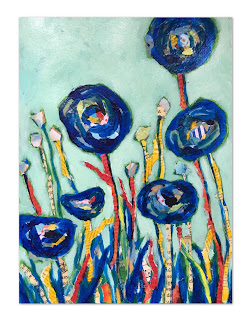
Shelli Walters is an Oregon-based artist and graphic designer. Her collage work is intensely satisfying to look at. The richness of color, texture, pattern and dimension is often offset by a gentle background, or negative space painting, in a soft tint. I love this contrast. Her work was an instant must-do with my classes.
This project is meant to be freeing. No overthinking. No scissors. No erasers. No details. No need for a perfect drawing.
STEPS:
1. In pencil, using your non-dominant hand, draw 4-6 flowers with stems and leaves. Flowers should be simple (poppies are great for this). They should vary in size and angle. Fill the bottom of your composition with plenty of leaves and stems for visual wight and a natural fullness.
*Create an 'open composition' - i.e., your flowers should be going off the paper on at least 2-3 sides.
2. Choose your flower color. Paint flowers, stems AND leaves in this one color. Your color should be bold and not too light (dark red, bold blue, dark green are good choices).
3. First Negative Space Painting: Choose your background color. Paint the 'negative space' around your flowers, leaves and stems in this color. This color should contrast with your flower color.
4. Collaging: Gather a selection of collage papers in the color that you painted your flower. If your flowers were painted blue in step 2, choose blue papers in a full range of blues, including neighbor colors if you like (greens or purples). Also include neutral papers (book, music, dictionary paper). Make sure to include both patterned and solid paper.
Flowers:
Paste scraps of collage paper in this color on your flowers. When pasting collage scraps, DO NOT COVER the whole flower. Instead, let some of the initial painted flower color show through the collage scraps, or allow for this color to define the contour edges of your flowers. Think of the collage scraps as enhancing and accenting the original flower color.
 |
| Work in progress |
 |
| Work in progress |
For 'unity', use each patterned or colored paper more than once throughout your composition.
GLUE: We used acrylic gel medium to paste our papers. We glued 'under and over', like you would when decoupaging.
Stems and Leaves:
You may choose to use the same color scheme in your leaves and stems, or you may choose a range of greens, blues and naturals for a more 'realistic' look. To create 'weight' at the bottom of your composition, fill it up with leaves, stems, flower buds, etc. This area could be collaged with darker papers for a fuller, denser, more shadowed look.
5. Second Negative Space Painting: Repaint the negative space around all flowers, stems and leaves once again in a lighter tint of your original background color. If your background color in step 3 was red, you will use red with PLENTY of white for a light tint of red. The goal is to go super light with this step, so use lots of white. This soft tinted background will offset the bold colors and patterns in your composition, emphasizing your flowers.
*Use your brush loosely in a stippling motion in this step, and allow some of your original background color (for example, red) to show through, particularly around the contours of your flowers, stems and leaves. This will create interesting bold contours, color contrasts, a shadowing effect, and texture.
6. Refine and add details. You may choose to paint a dark center in your flower, or paste a few more scraps here and there for balance and unity.
7. Ensure any paint is dry. Apply a full coat of acrylic medium (in glossy) to add a glossy sheen to your composition, and to fully seal all collage papers.
We did this project in one 3-hour class on 30x40 cm acrylic paper.
This project was so much fun, and it was so wonderfully tactile. Everyone went home begging to do more collage projects.
Maybe we'll try Shelli Walter's landscapes next? Who knows!