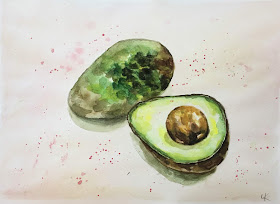
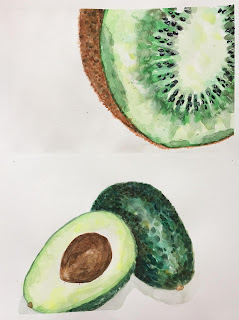
Late summer call for limey and zesty flavors. Before letting summer slip out of our hands, I wanted to make an ode to the avocado. And how timely, since my adult class has been working on watercoloring, and I wanted them to do a project that really just focusses on one color (or so). And so it was the avocado fit both my seasonal and my color aspirations!
Process:
Students had many avocado photos and paintings to inspire them. They had to create a unique composition with avocado halves, including the pit and the hallowed pit side (for practice in shading and creating dimension). Additional options were limes, jalapeños, kiwi, cucumber, pepper, etc..... as long as it's green.
Our pallet was made up of green, ultramarine blue, burnt umber, ochre and yellow. We used tube watercolors. We mixed many different colors with our limited palette for a rich, and varied piece: blue-greens, blue-yellows, green-yellows, blue-brown, green-browns.
You could even leave out the green altogether, and just mix your own greens with blue and yellow. Fun and extra challenging!
Compositions were drawn out and then the painting began. Before coming to class, we had watched several watercolor avocado painting tutorial on YouTube (yes, I assigned homework)... this helps us get prepared visually and mentally for our project, and it saves us lots of time once in class (flipping the classroom!). Here is an example of a good tutorial. But there are many.
We used a wet-on-wet technique to paint the green flesh, starting slightly darker on the outer edge and getting lighter as we painted toward the kernel. With watercolor, sheer applications of color and lots of light is critical, so we never go too dark or too pigmented to start. We always strive for that light, etherial look, which in many cases may mean no color at all (just the white of the paper).
The dark shell was done wet-on-dry with a mix of blue, green and burnt umber for a dark earthy brown. Color was more pigmented here for a more intense color. Light stippling of an even more intense color was applied to the shell, to create that puckered avocado shell look. The seed was also done starting super light (nearly white) and gradually going darker and more pigmented toward our darker side. Any hard edge between color were blended out with extra water to create a soft transition, and to further create the rounded dimension.
*Keeping brush and paint pretty wet, but not uncontrollably wet, is key to a soft finish with no hard edges.
Shadows were added and backgrounds were done wet-on-wet in a super light wash.
These were done in our 3 hour class. A simpler version, with just avocado half or halves, could be done in a shorter class. My adults had fun with these, and we all went home feeling rather hungry.


