|
| Teacher Sample |
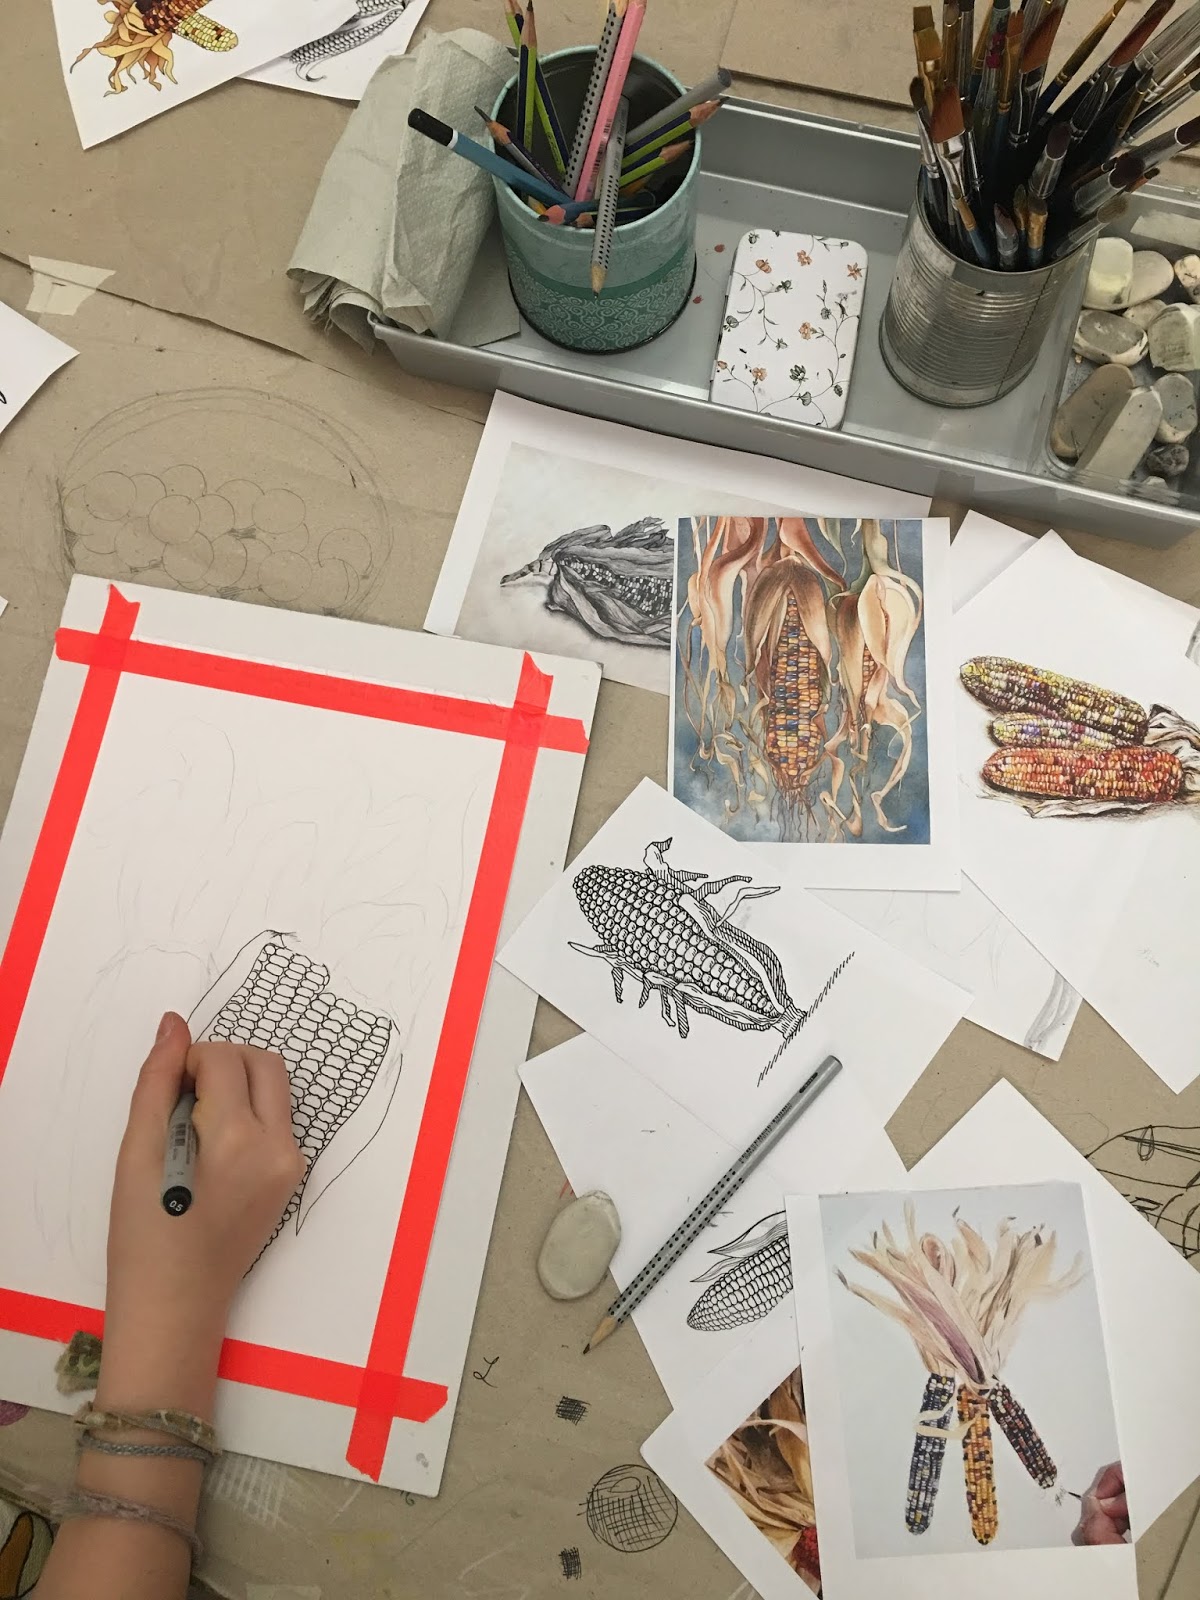
Fall is so much about color and a bountiful harvest. Indian corn is both of these things. I'm fascinated by the colors, the glossy kernels and the wild, papery husks and knew this would be a wonderful theme for an art project. I explored and experimented with a few mediums and approaches (like close-up kernels and coloring with marker) and eventually settled on watercolor and pen. This project focusses on observational line drawing, watercolor and pen techniques, and color.
Process
Day 1
Students become familiar with Indian corn. We look at many pictures, illustrations, and paintings of Indian corn, in all it's colorful and diverse glory. Students are presented with the objectives for our project:
- Draw 2-3 corn cobbs with husks
- Overlap corns and husks (think about composition - husks should be various sizes, shapes and go off in different directions
- Draw corn kernels (not too small, and no more than 4-5 vertical rows)
- Shade with pen using hatching, cross-hatching and stippling
 |
| Objectives and demo |
 |
| Kernel drawing demo |

Drawing:
I demonstrated on the board how I might draw a corn cobb (not too fat, not too thin, a bit wider at top and narrower and rounded at bottom. Then I underlap two behind the first in a visually pleasing manner. Husks are trickier. We looked at husk pictures and the actual husks I brought to class. We noted the papery texture and the many bends and crinkles. I demo'd how husks grow up and out of each corn cobb and go every which way. Some are wide, others thinner, some longer, others shorter, some bend forward or backward, many overlap each other. Students draw out their compositions. Some students had to be encouraged to draw their corns larger, or to add more husks.
Kernels:
Kernels look tricky but are actually quite easy. I demo'd how to draw 4-5 vertical rows down the front of our corn, and how to fill each row with plump kernels. Kernels should very in shape and size a bit, so as not to end up with a super 'perfect' row, which would look unnatural. Kernels should be plump, and a bit disc-shaped, and should touch up against each other. There should not be any space between kernels. When the lines of our kernels meet up against each other, it creates a darker line, which in the end will create the illusion of depth. Kernels at the very bottom get smaller, and might even look like little balls. Kernels on the outer vertical rows of our corn might be a bit smaller too, because they are curving back in space, so we only see a portion of them. The rows in front are larger. This creates a 3-D look. Students were surprised at how much dimension their corns had. Once everything was drawn, we traced our pencil lines with permanent black fine liner marker and erased our pencil lines. As always, we used various widths of marker - larger for main contours, and smaller for details and shading.
Shading:
Students used hatching, cross-hatching and stippling to add shading, texture and detail to their corns and husks. As a rule of thumb, I tell the kids that any place that is overlapped or right up against another place will have a shadow, so make some marks there!
Some students chose to stipple or color in a few of their corn kernels, since Indian corn is often randomly dotted with very dark kernels.
This was what we managed on day 1 (90 minutes)
 |
| Day 1 illustrations, little class (7-8) |
 |
| Day 1 illustrations 8-10 years |
 |
| Day 1 illustrations 8-14 years |
Day 2
As always with watercolor, we start with very light washes of color, and slowly build up more color intensity. Students decided which colors their corn would have. I suggested warm colors, cool colors and rainbows colors. To keep colors a bit less bright, and more autumnal, we mixed in some browns and ochres and ultramarines in with our colors. Basically, I encouraged students to not be afraid of using the 'dirty' side of their palette when mixing their colors, and to allow for some unexpected colors to mix. Toning colors down will give us a more realistic Indian corn feel.
Corn were painted in their choice of colors. Our painting technique was less 'painting with brush strokes', and more 'dotting or dabbing' our brush around our corn, randomly dotting a light wash of color here and there. Then another color was 'dabbed' around our corn here and then, and then another, unill our corn had a few different colors. Because we used lots of water on our brush and a light wash of color, these colors subtly bleed into each other creating a soft but colorfully subtle under-layer. Once a bit dry, we went back into our corns and dabbed again, this time with a more intense color (less water, more pigment) and dabbed just a few kernels here and there with this color, then a second color and a third. Students were encourage to not paint each kernel, rather, just a few. The more intense the color, the more dimension and interest our corn gets.
Husks were painted in a similar manner. The super light wash of our lightest color first (a grayish, neutral yellow or ochre). This color was dabbed around with a very wet brush anywhere where our husks are catching the most light. Our color must be transparent! Then we did this again with a second color, a bit darker (more intense grey, darker brown mixed with ultramarine) but focussed on areas that are slightly in shadow or shaded, or where areas overlap. And again with our third, darkest color, we dabbed color anywhere where we have more intense hatching, cross hatching or stippling. Since we already shaded with pen, it was easy for the kids to see where their darker paint should go. Each application of paint should be somewhat transparent, to ensure we can still see the beautiful pen illustration underneath, and to impart lots of light and dimension (the beauty of watercolor).
Backgrounds were done wet on wet, also with a very wet brush and super light wash of color. Again, brushwork involved dabbing and slightly pushing color around, rather than streaking color with brush strokes. This gives us a more cloudy, foggy, softer look, and prevents that streaky appearance.
My kids of all ages (from 7-14) and my adults were all wowed by their results.
 |
| Petra, adult |
 |
| Lisa, adult |
 |
| Anuradha, adult |
 |
| Rune 7 |
 |
| Phoebe 10 |
 |
| Vita 12 |
 |
| Daniel 8 |
 |
| Dasheng 10 |
 |
| Sif 10 |
 |
| Adult class |
 |
| Adult class |
 |
| Little class (6-7 year old) |
 |
| Kids 8-14 |
 |
| Kids 8-10 |